23 / Feb, 2018
Comment 20446 Views Lightroom - Comment faire pour installer les préréglages Lightroom dans le didacticiel Lightroom
Category: Photographie
METHOD 1
HOW TO INSTALL LIGHTROOM PRESETS (MAC & PC)
Download your presets for Lightroom. Keep in mind that presets arrive in a zip file, so you will need to unzip them and extract the files.
Open Lightroom.
On a Mac, open Preferences in Lightroom. On Windows, open Edit then Preferences.
Select Presets tab in the Preferences box.
You will need to click on "Show Lightroom Presets Folder" and then open the Lightroom folder.
Open the "Develop Presets" folder. You can then easily copy and paste presets into this folder.
Once you restart Lightroom, you will find your presets in the Develop Module under the Presets.
You can now easily access your new presets and use them to adjust or enhance your photographs. You can periodically check for new presets as we bring updates regularly. With these tips, you'll be able to upload them into Lightroom and use them as you want.
On a side note, remember that one of the best ways to adjust a preset is to modify the white balance or exposure of the photograph, using the sliders.
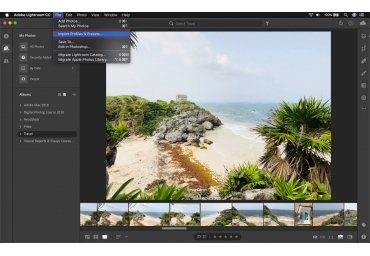
You can also create a new destination folder for your Lightroom presets, if you prefer, by clicking on Import and copying the Preset to whatever folder you want (Method 2).
METHOD 2
HOW TO INSTALL PRESETS FOR LIGHTROOM (MAC & PC)
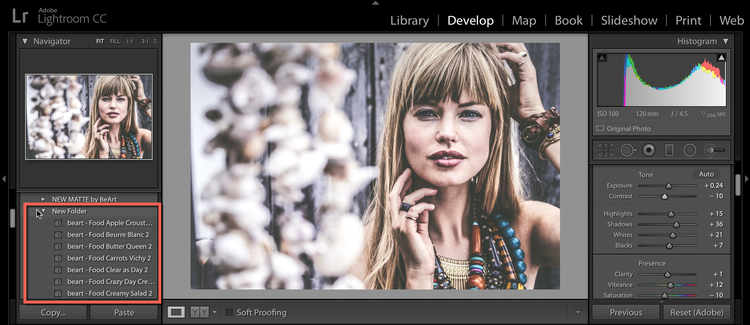
1. Open Lightroom and go to Develop Mode.
2. Click on the right button of the mouse to create a New Folder.
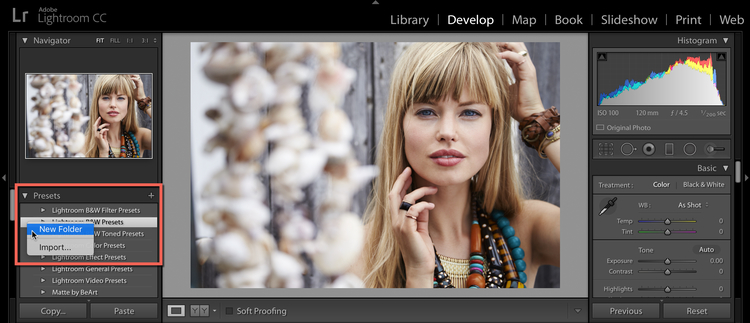
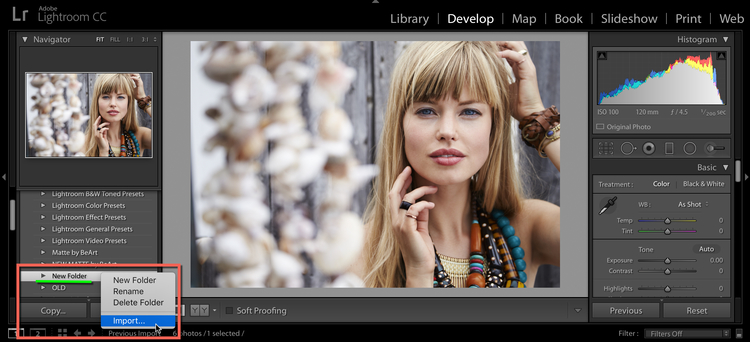
3. Right-click on the "New Folder" (you can rename it later), to import unzipped presets for Lightroom into created folder.
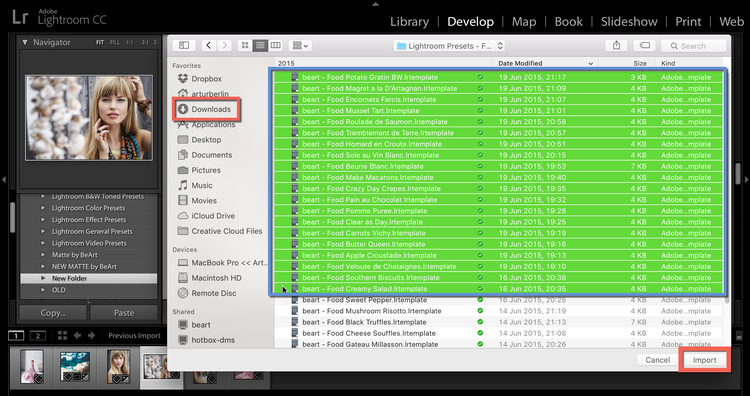
4. Browse to where you have saved the unzipped Lightroom presets folder (this is usually your "Downloads" or "Desktop" folders). Then select all the .lrtemplate files and click “Import”.
5. Now, you can use your presets for Lightroom. Enjoy!

 Italiano
 English
 Deutsch
 Español
 Português