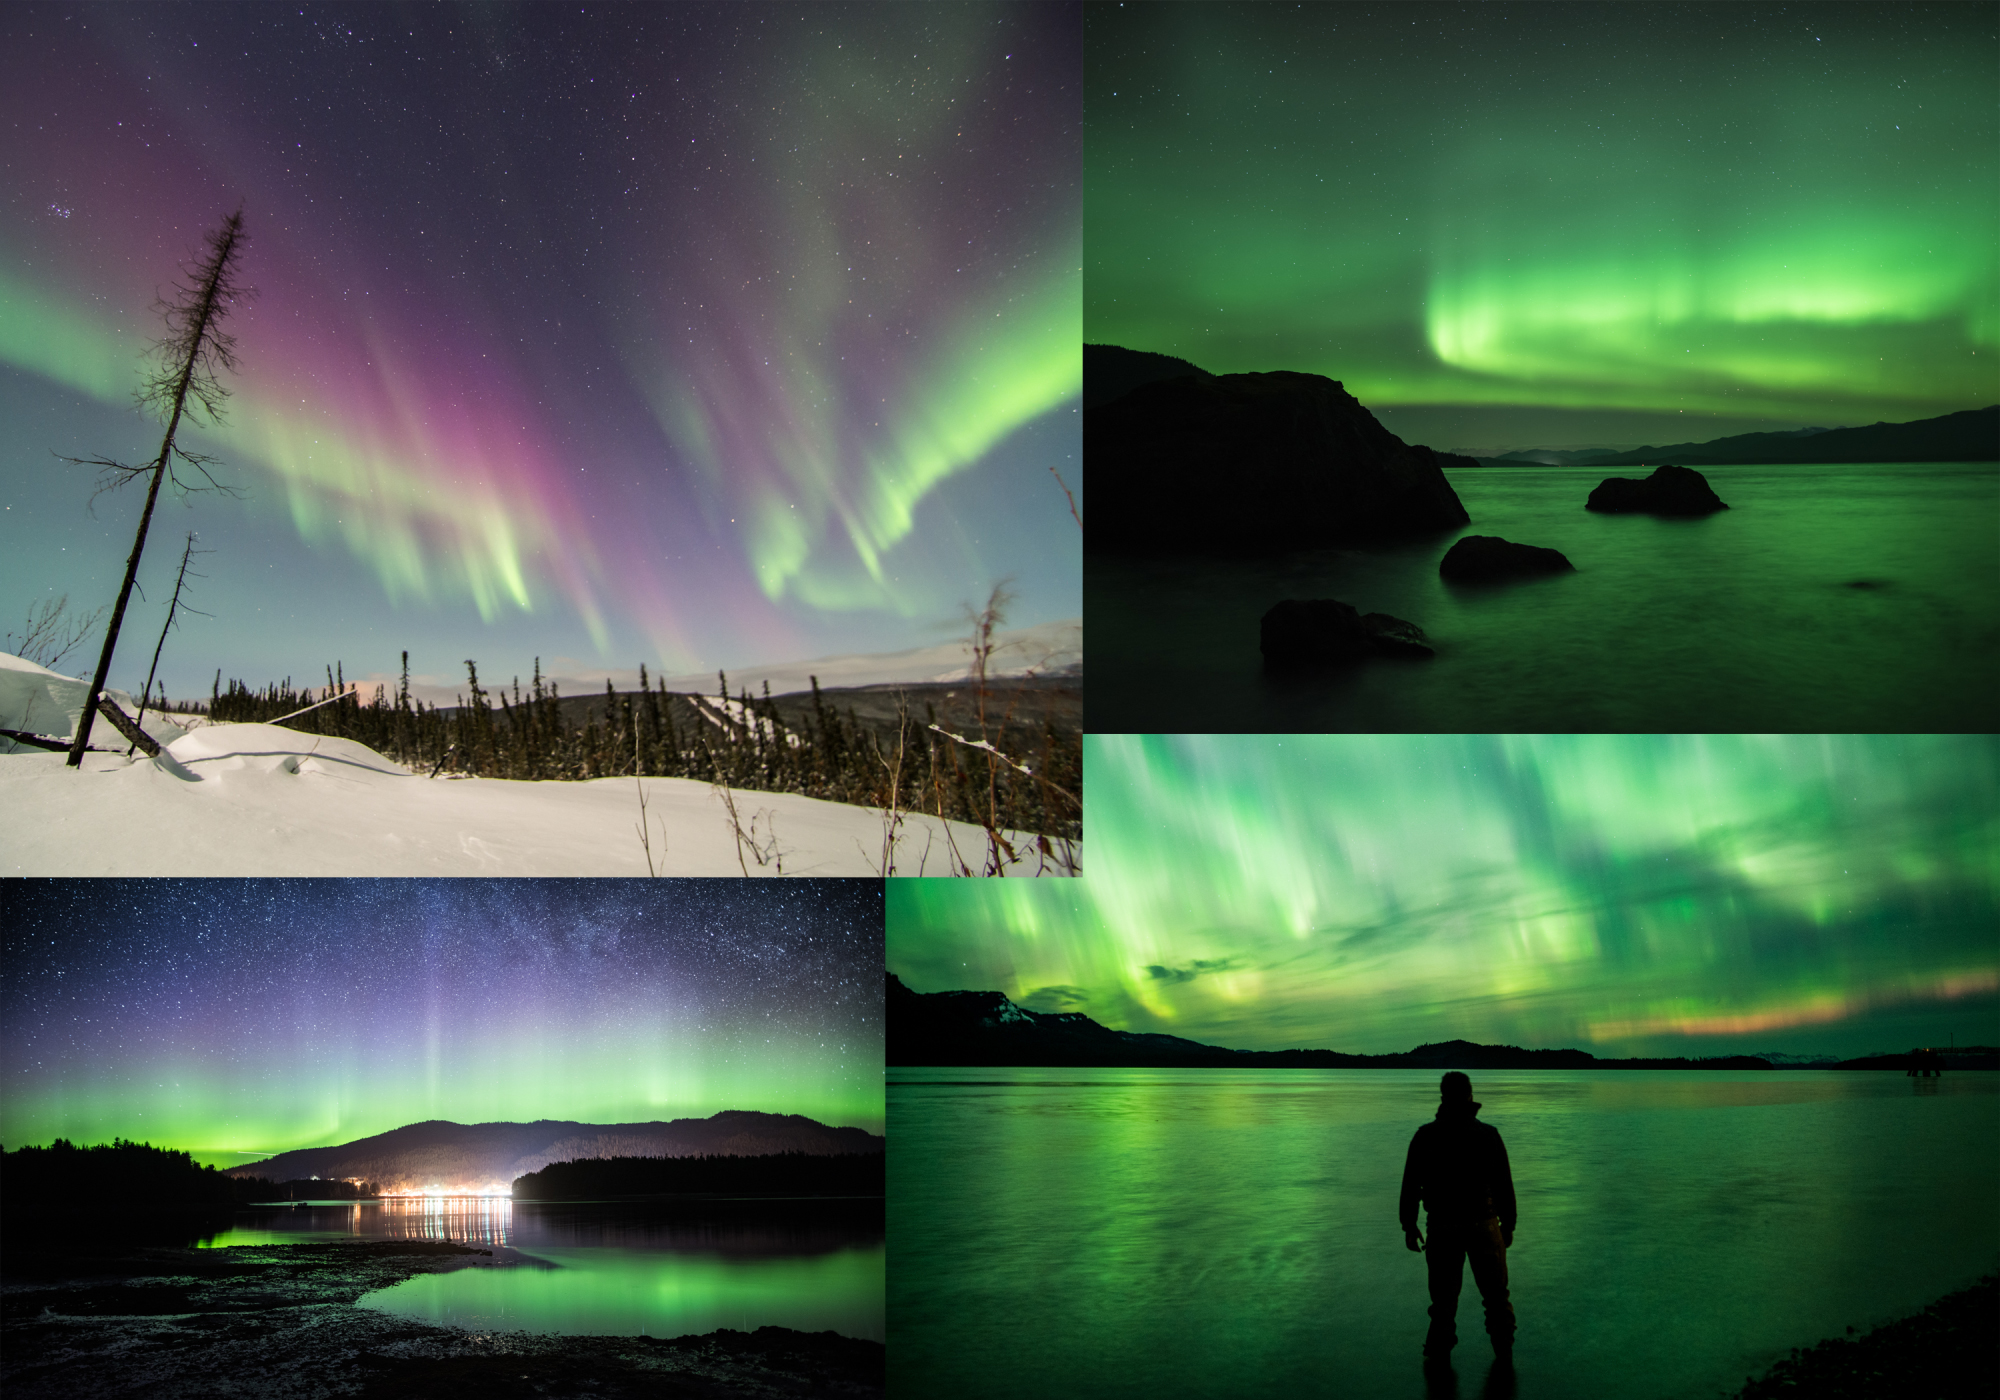
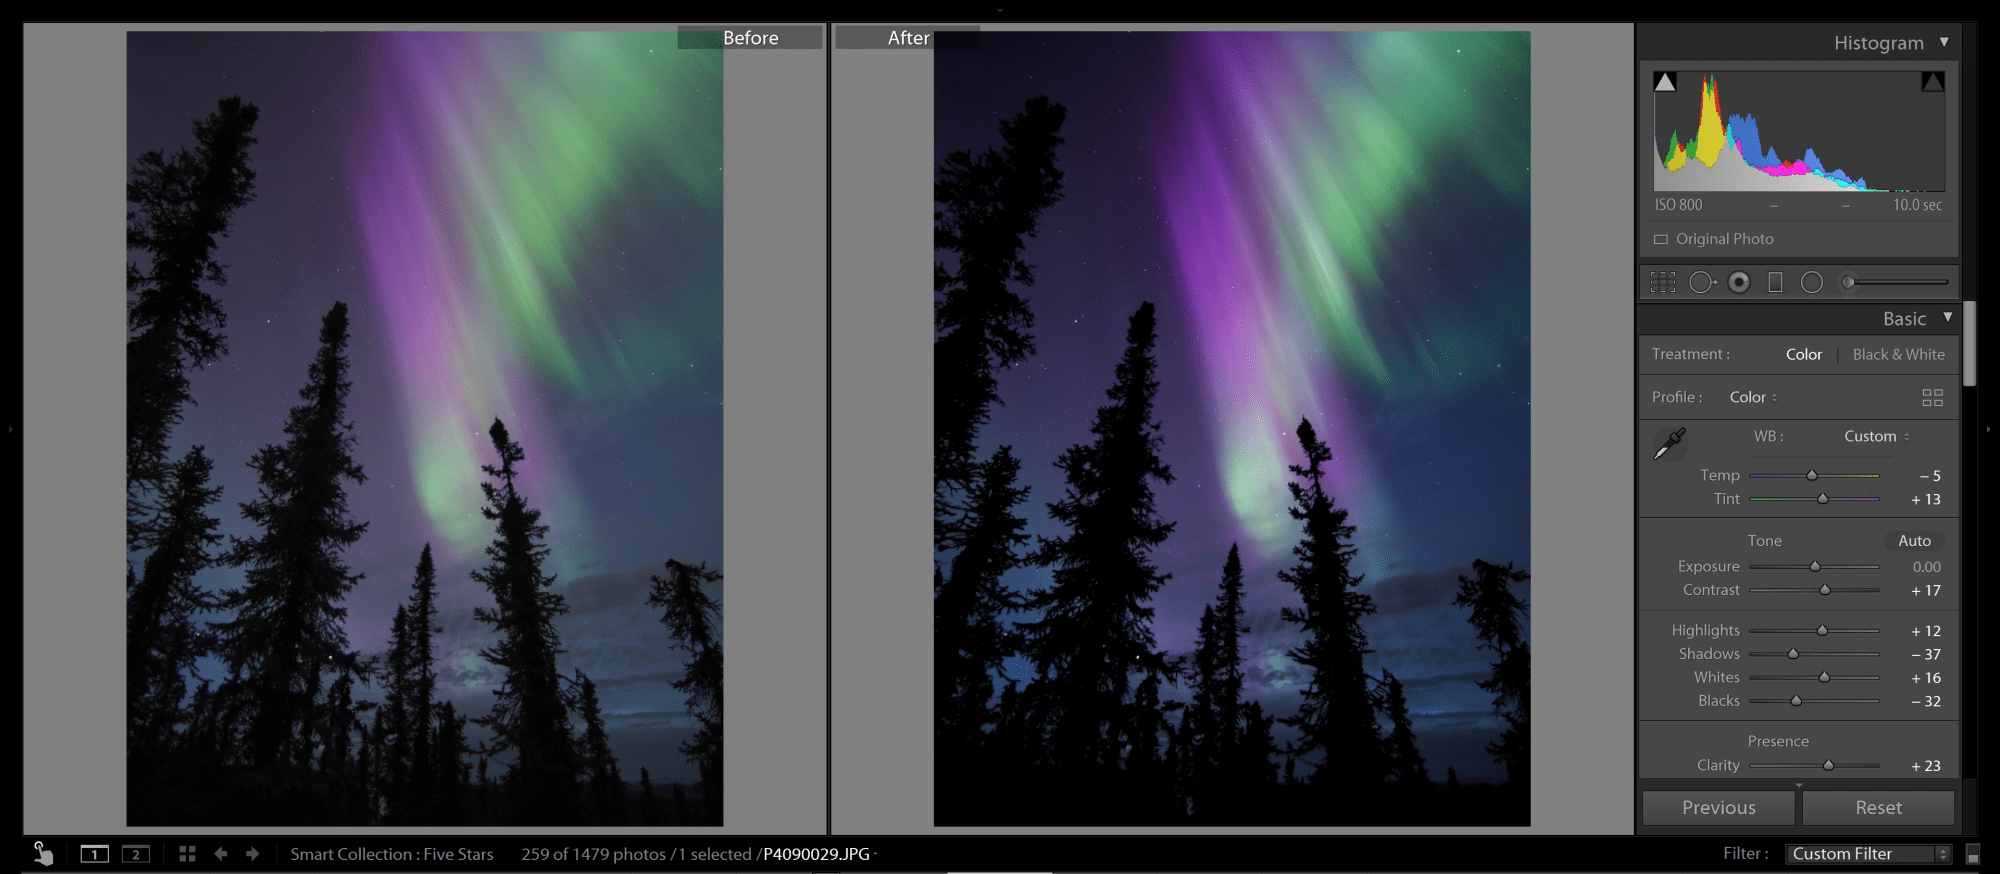
In the images above, I minimally edited the Aurora and was sure not to over-enhance it. Understanding how the Lightroom slider controls impact your Aurora shots can help you achieve natural and beautiful edits of the Aurora Borealis.
Advancement of digital cameras and photo editing software has created an incredible opportunity to edit your shots after a night out under the stars and Lights. The advent of post-processing technology has, in my opinion, resulted in many Aurora photographs which are over-processed to bring out rich saturation and contrast that did not exist in the original scene. Because many of the middle tones (colors) of the Aurora are so pure and contrast so highly with the sky, it is easy to eject the equivalence of pixel-steroids into your image giving them a false look.
It is my goal when editing Aurora shots to enhance but not over-enhance. Understanding how each of the basic Lightroom editing tools impacts an Aurora image can help you tell the story of your night out by making your image look like they did when you saw them.
Lightroom basic sliders
To illustrate how the Lightroom basic sliders (contrast, clarity, dehaze, tint, saturation, vibrance, shadows, highlights) affect an Aurora image it is easiest to look at how extreme values for each setting impact the image. For each slider type, I will walk you through how the slider impacts any image (i.e., the definition of the slider). I will apply it at extremes to the same Aurora image to show a before (no edits) and after (extreme applied) comparison.
1. Contrast
Contrast is a very useful slider and a fundamental one for editing. By definition, the contrast tool darkens the darkest mid-tones in the image and lightens the lightest mid-tones. In an Aurora image, many of your mid-tones are going to be in the Aurora itself. So, you can see as you slide the contrast to 100% that the colors in the Aurora darken giving the image a more saturated look.
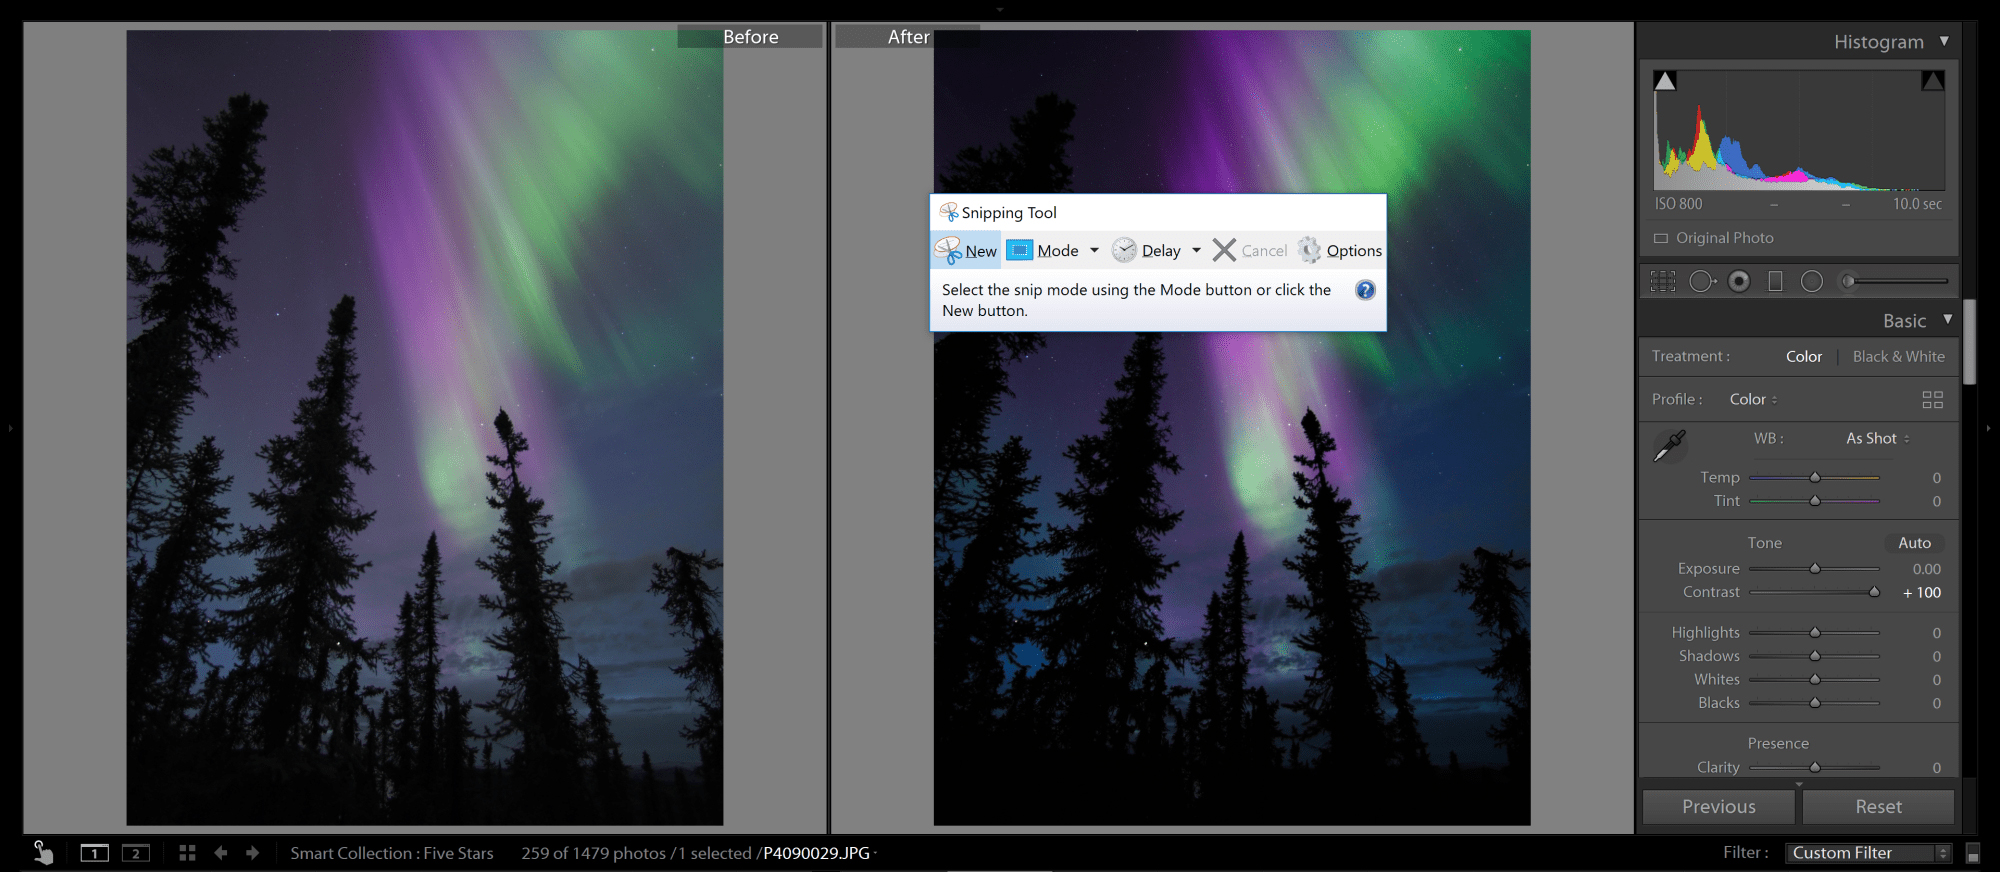
Extending the contrast to +100 increased the saturation in the Aurora and the foreground shadows became much deeper. Boosting contrast and adding saturation or vibrancy can have a compounding effect and lead to an image that appears over-processed.
2. Clarity
The clarity slide adds contrast in the mid-tones without adding much noise. The tool is often used to bring out texture and details. Again, Aurora colors fall into the mid-tones of your image, so a clarity boost impacts them strongly. Boosting clarity to +100 creates definition in the banding of this Aurora shot because there are vertical dark lines of the sky in the Aurora. You may like the clarity slider for Aurora shots because it doesn’t add as much contrast as the contrast slider does and can make stars in the image pop and seem crisper.
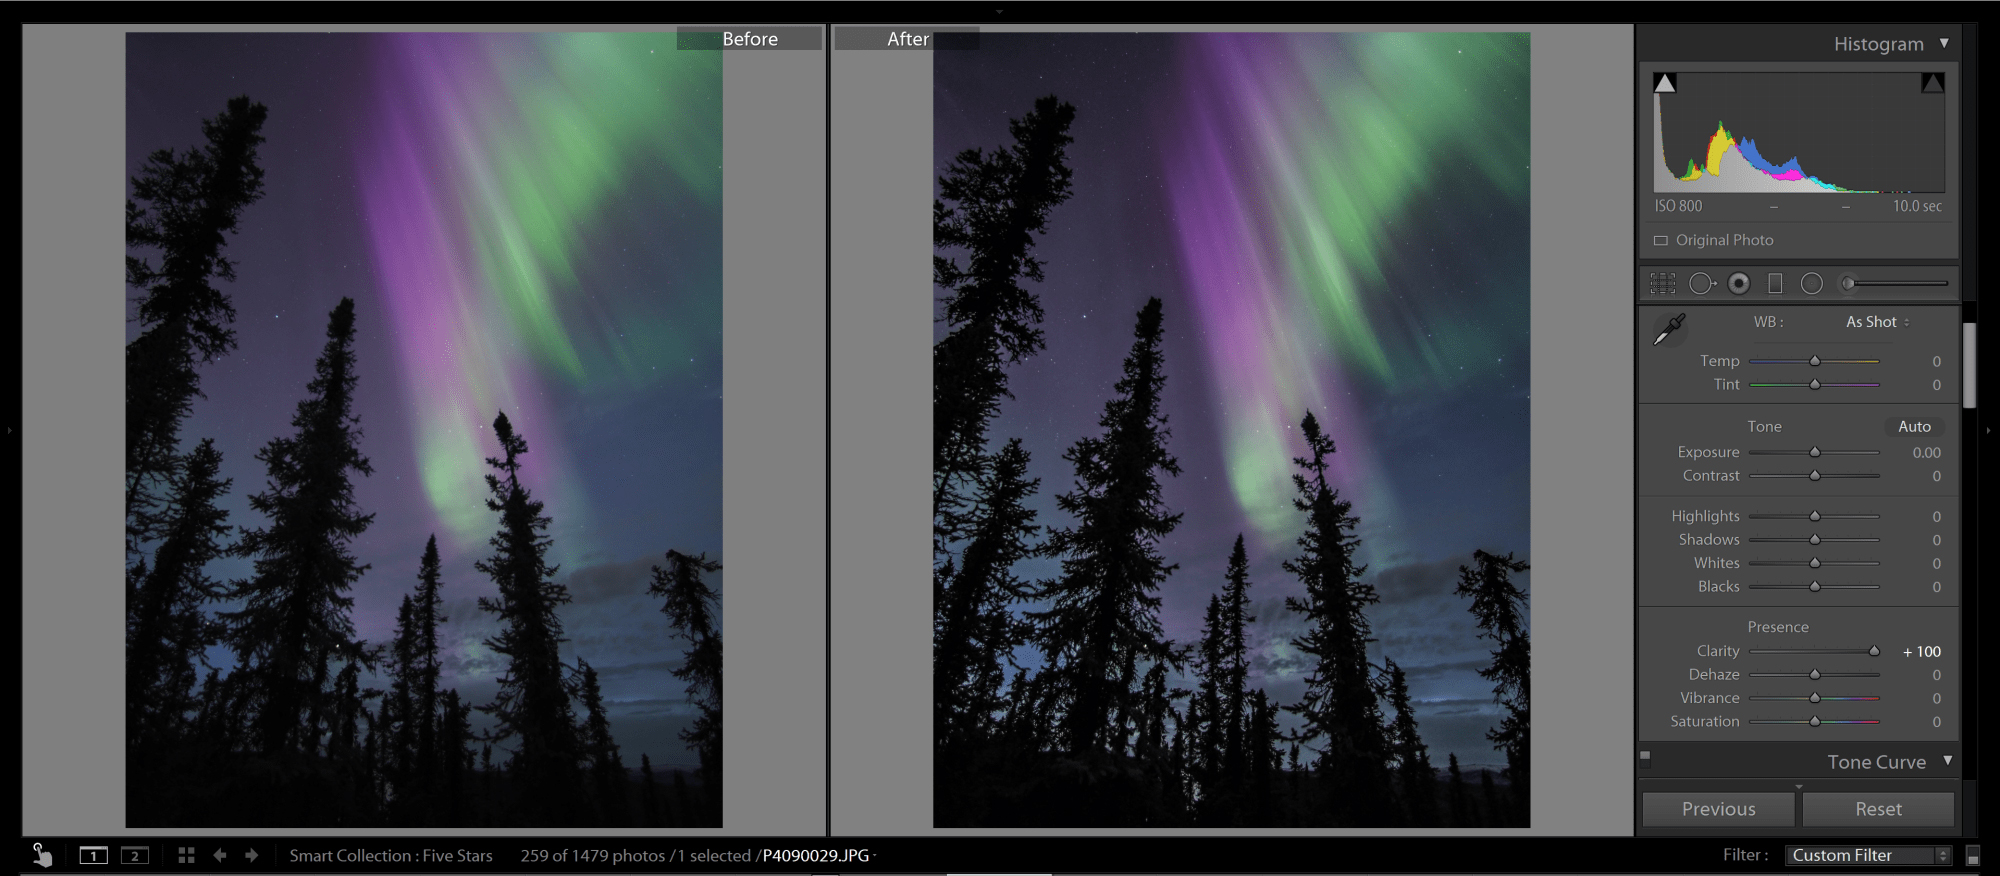
Adding +100 clarity increases the banding in the Aurora and you can see the stars stand out more. It did not add any saturation or other artifacts to the image.
3. Dehazing
Similar to clarity, the Dehaze slider increases midrange contrast and shadows giving the images a slightly dark and more saturated look. However, the Dehaze slider was built to remove fog from a scene. When you apply its technology to an Aurora shot, it adds a lot of contrast and saturation to the image. This is a slider to use gently (if at all) for Aurora image editing.

In comparison to Clarity, the Dehaze slider adds a lot of contrast and saturation to the Aurora image if it is boosted to +100. The Dehaze slider can be useful but use it sparingly (if at all) for editing your Aurora images.
4. Saturation
The saturation slider globally (for the whole image) deepens, intensifies, and brightens the color. In an Aurora image, you will find it is very, very easy to overdo the Saturation of an image. So, use Saturation sparingly. When slid to +100, it turns the Aurora to an almost neon appearance. At -100, it strips all color from the image. There are times when bringing the saturation out of your Aurora image by -5 or -10 can help improve the appearance of the image and make it easier for the eye to comprehend.
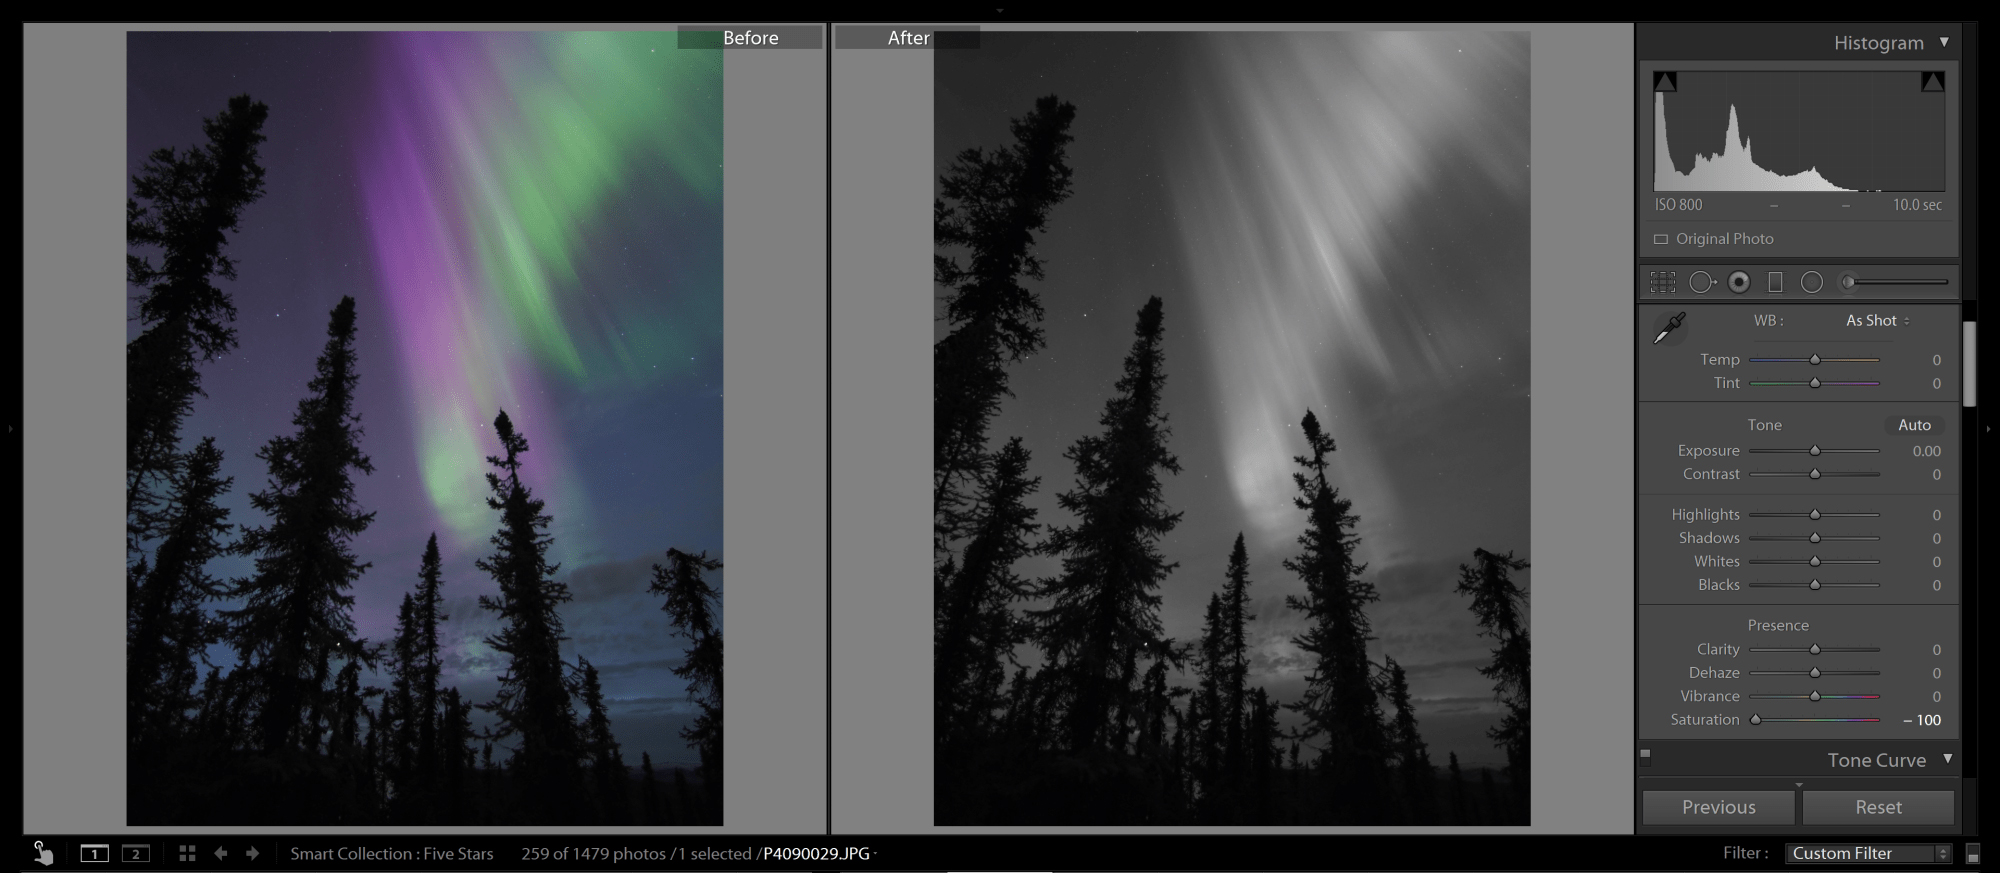
Bringing all of the saturation out of an image renders it to black and white
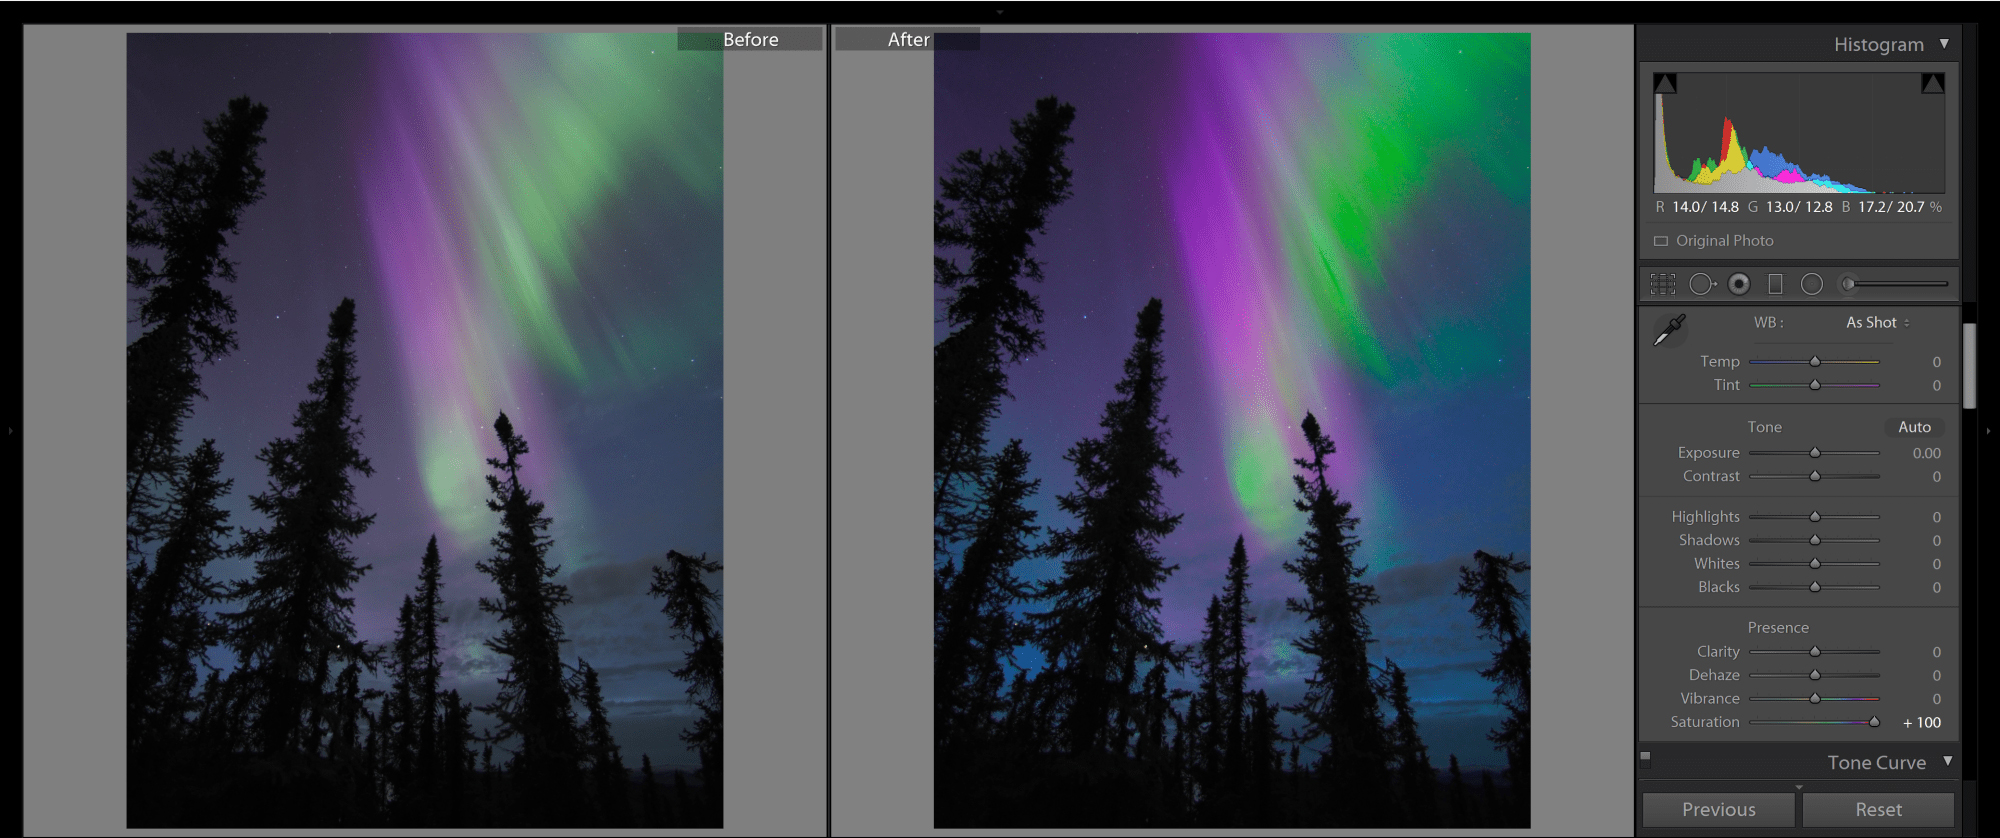
Over-saturating your Aurora image gives it a fake, neon look
5. Vibrance
Vibrance is the “less aggressive” form of saturation. It’s a smart tool that increases saturation and tones in more muted colors. In Aurora shots, the Vibrancy slider focuses on the Aurora and provides a more realistic enhancement of the colors. You can see in the examples below there is still danger in over-using it. A vibrancy value of +100 creates neon colors similar to overusing saturation. However, at -100 you can see there is a distinct difference from -100 Saturation. The -100 Vibrance does not remove all color from the Aurora. You may find it a powerful technique to decrease your saturation slightly before increasing vibrance.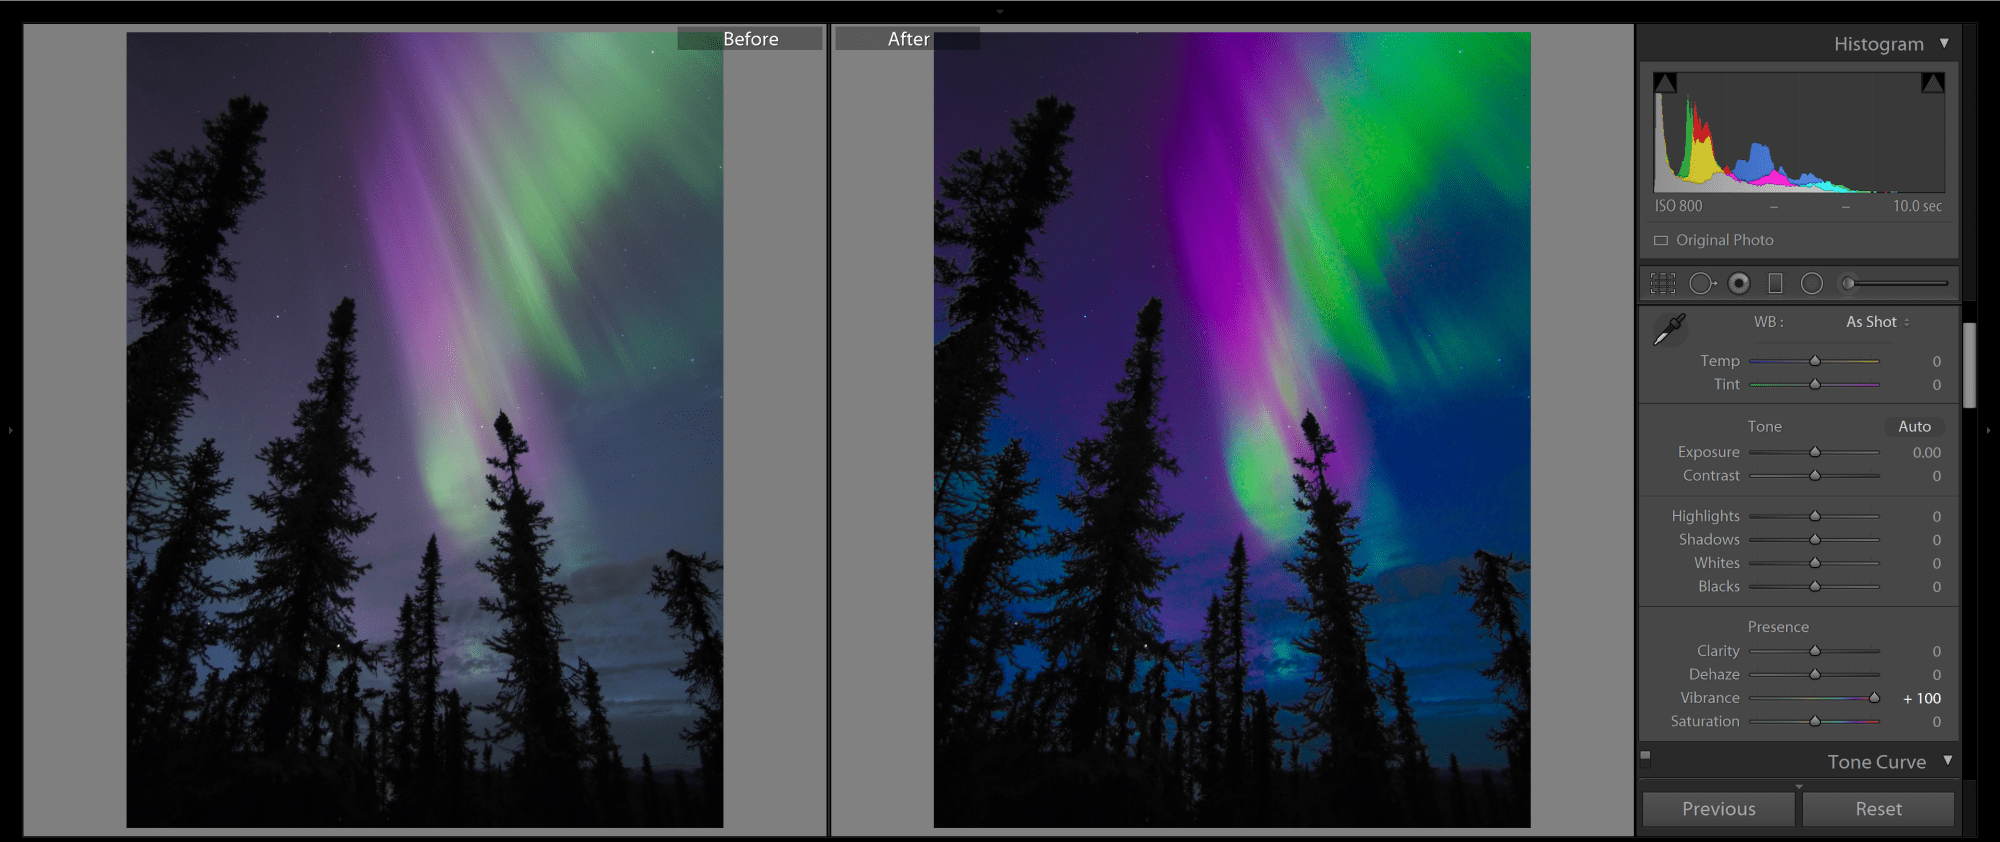
You may find Vibrance to be the most useful for natural Aurora image editing. However, boosting it too much will still result in a highly over-processed image
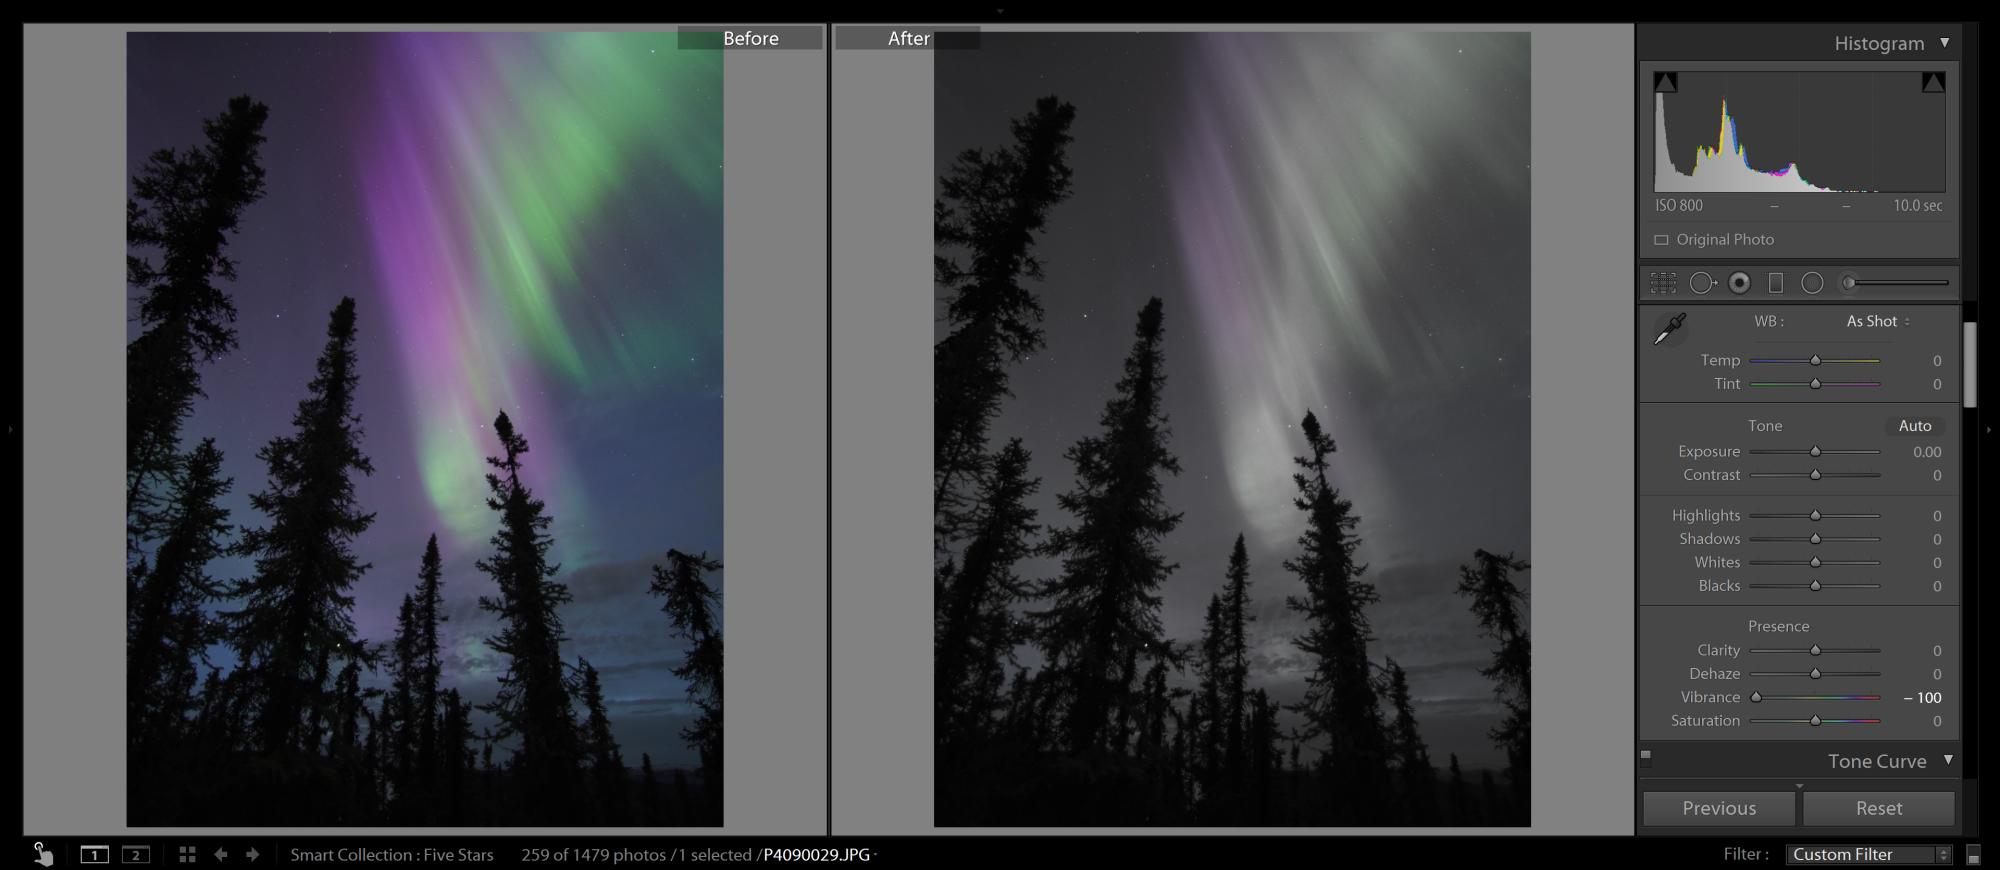
In contrast to Saturation, you can remove all of the vibrancy and still have some color left in the image
6. Shadows
The Shadow slider increases luminosity in the darkest parts of the image. With a picture of the Aurora, you have a distinct advantage in that the Lightroom program interprets almost any part of the image that is not Aurora to be a shadow. So, you have the power to lift or darken your foreground very easily. You can see in the +100 shadow example below, details were brought out of the shadows in the silhouettes of the trees
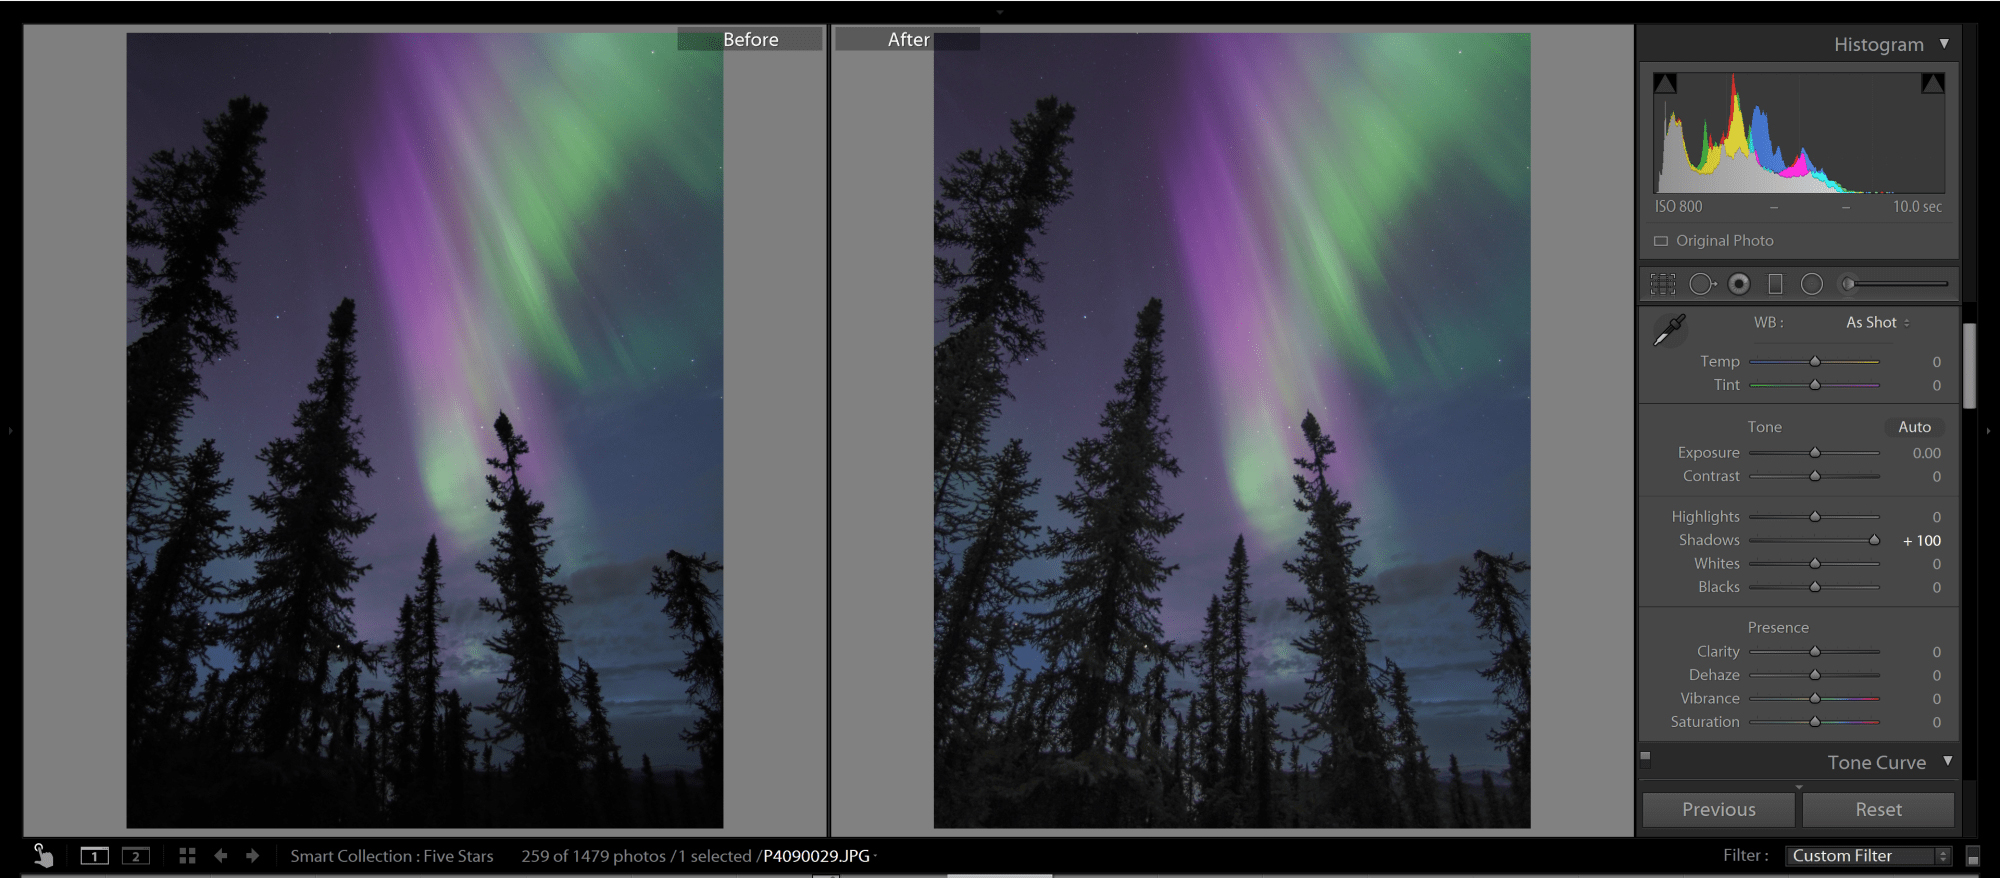
There is a very clear definition in an Aurora image between the highlights and the shadows. Increasing the Shadows will raise the luminosity of any part of the image not covered in Aurora
7. Highlights
The Highlights slider increases luminosity of the brightest parts of the image. As I describe above, Lightroom interprets any part of the image with the Aurora to be a highlight. That means an increase in the highlights to +100 effectively increases the exposure of the Aurora. If you over-expose an Aurora image in the field, decreasing the highlights can help you reclaim lost detail.
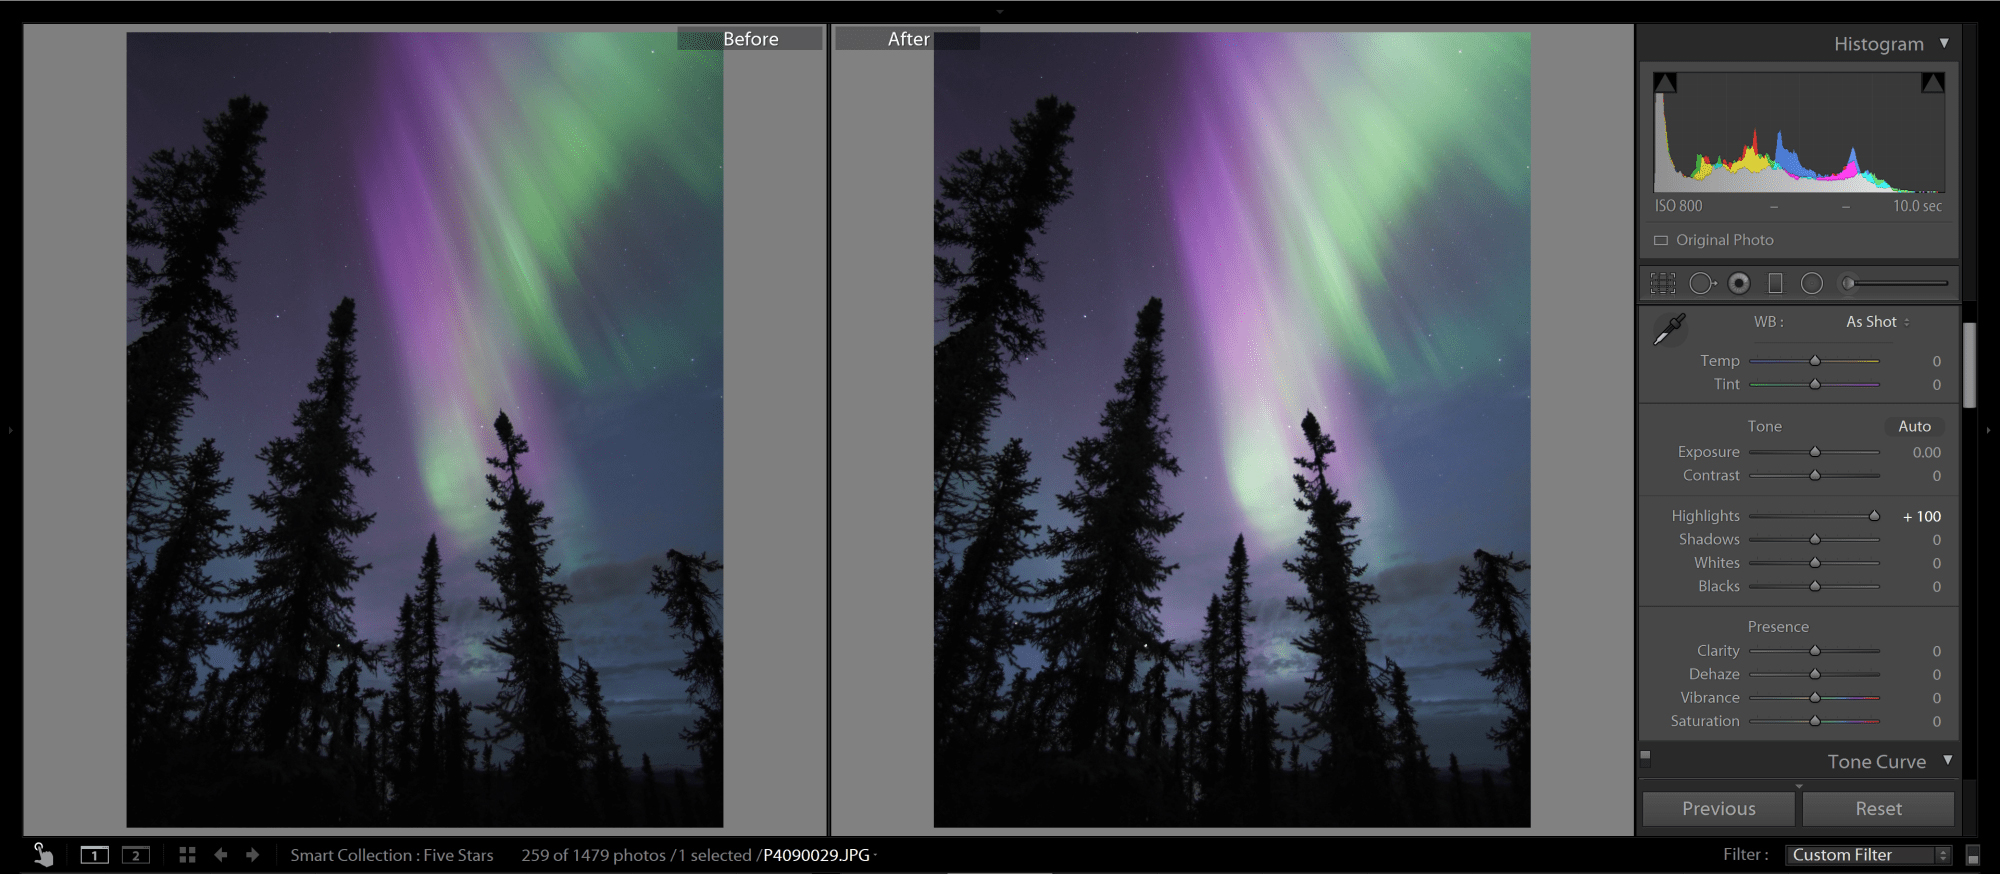
There is a very clear delineation between shadows and highlights in an Aurora image. Increasing the highlights to +100 only impacts the brightness of the Aurora. In this image, it gives the Aurora an overexposed feeling
8. Tint
The Tint slider is a meant to be used for color correction in correspondence with the temperature slider. You can use the tint slider to neutralize the snow which tends to turn green during intense Aurora outbursts. Use a Graduated Filter, coupled with increased pink tints and decreased saturation, to return your snow closer to white. Often, this helps your eye focus on the Aurora and can restore balance to the shot.
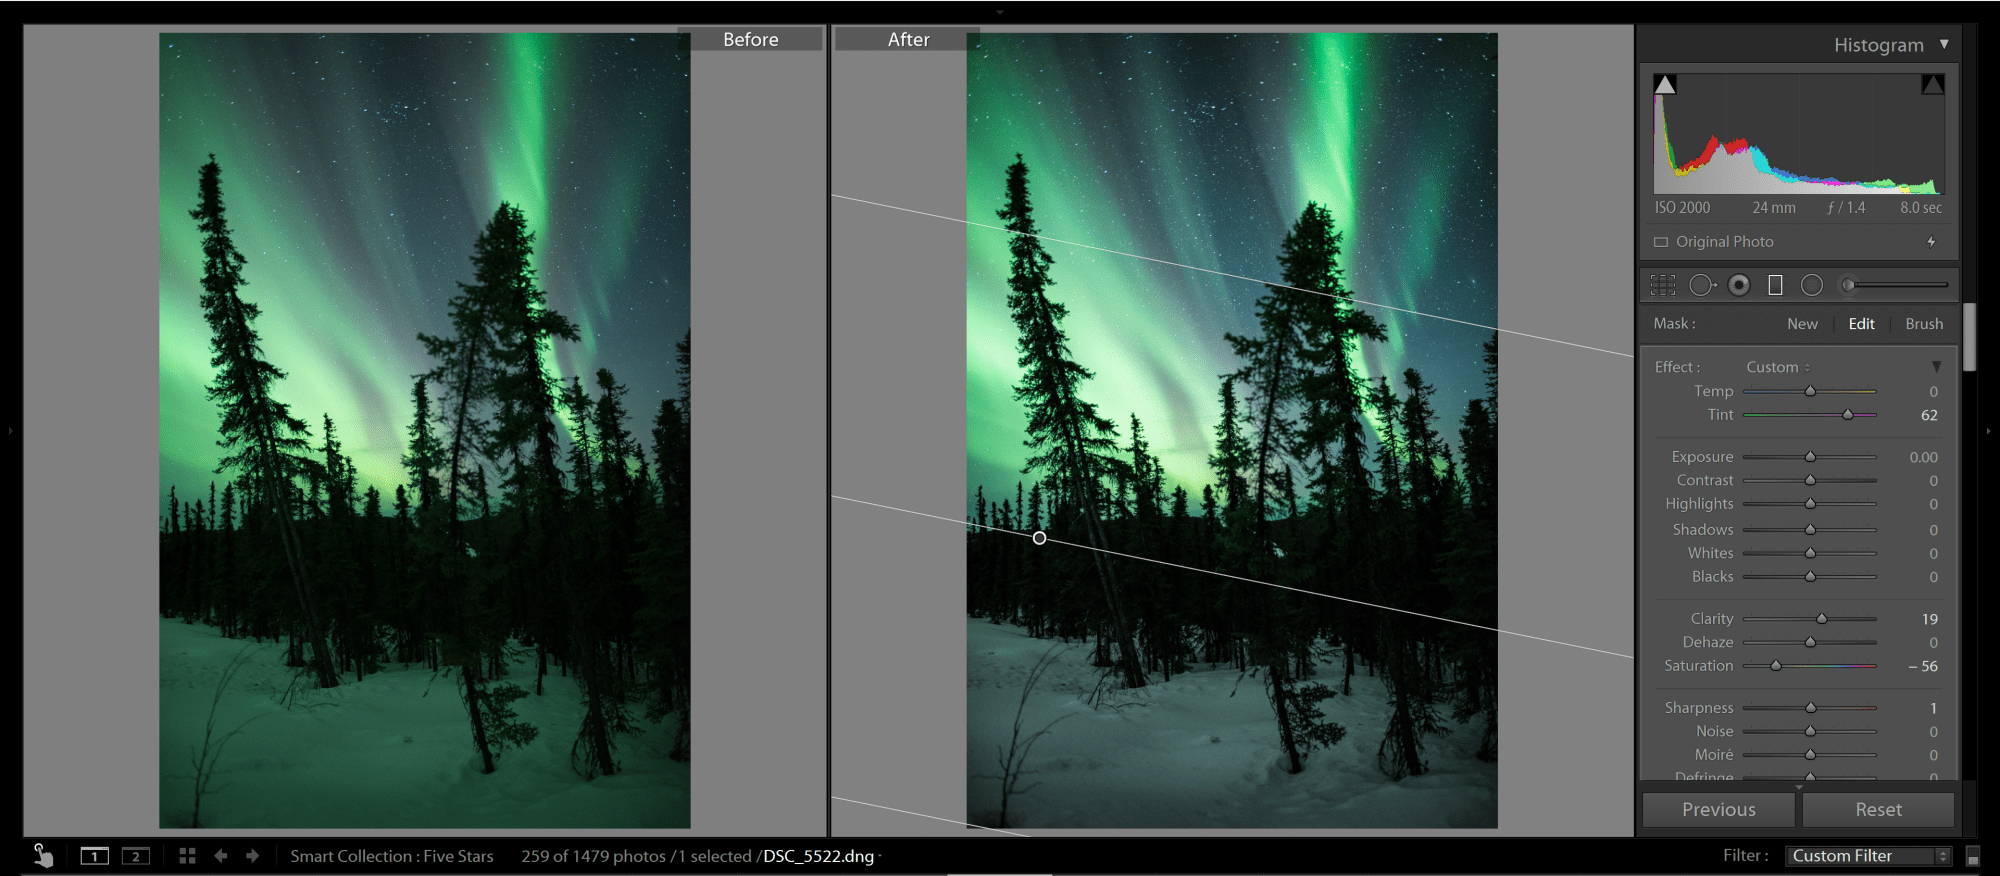
Using tint to do color control on an Aurora image is a bit more advanced, but you will find that you can control the color of the snow by combining the Tint and Saturation slider controls
Putting it all together for a final edit
Now that you know how each slider impacts your overall image, its time to combine each in moderation to achieve a final edit. In the edit below I wanted to make sure the banding in the Aurora was enhanced along with the purples of the “sun-kissed”Aurora. My final edit brings out features of the image without over-enhancing it.

 Italiano
 English
 Español
 Português
 Français