Adobe Photoshop has always been my software of choice when it comes to landscape photography and post-processing. However, Adobe Lightroom is constantly getting better and I’m able to do a lot of the things I could only do in Photoshop several years ago.
The Lightroom Graduated Filter isn’t a new feature but it’s one that I’ve begun to use more and more during the last years. It’s a tool that can make a huge difference to an image and it’s fairly easy to use. The big benefit is that you can add several graduated filters to one single image. You don’t have to only use one. This gives you more flexibility.
Soft transitions vs. hard transitions
The very first thing you need to know about how I use the Graduated Filter is that I never use a hard transition. That means that I don’t drag the filter down and include the top part of the transition. (If you’re not familiar with this tool, any adjustment you make is visible at a 100-50 percent opacity transitioning from the top to middle line and 50-0 percent from the middle to the bottom line)
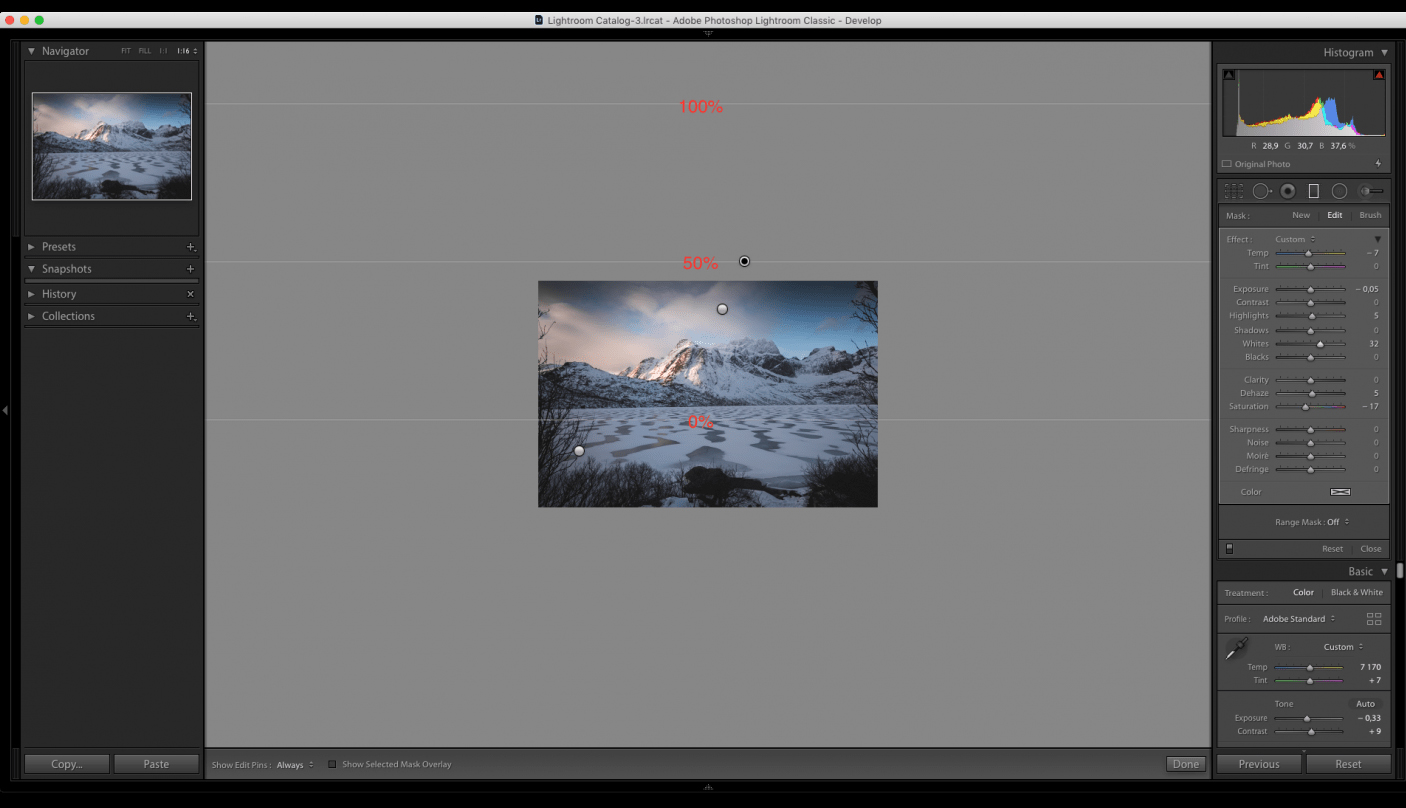
You don’t want there to be a hard, visible transition that obviously shows the adjustment made to a particular area. Instead, you want a long and smooth transition.
This is done by dragging the graduated filter from top to bottom, then moving it up so that the middle line is at the upper edge of the frame. You can then click and drag the lower line up or down depending on how much of the image you want to affect.
Keep in mind that when you’re using an adjustment as smooth as this, you’ll need to increase the values of the adjustments you’re making. For example, instead of exposure -0.2 you might need an exposure of -1.0 to darken an area.
Darkening the sky
The main purpose of Graduated Neutral Density filters is to darken the sky in order to capture a well-balanced exposure. This is also the most common use of Lightroom’s Graduated Filter.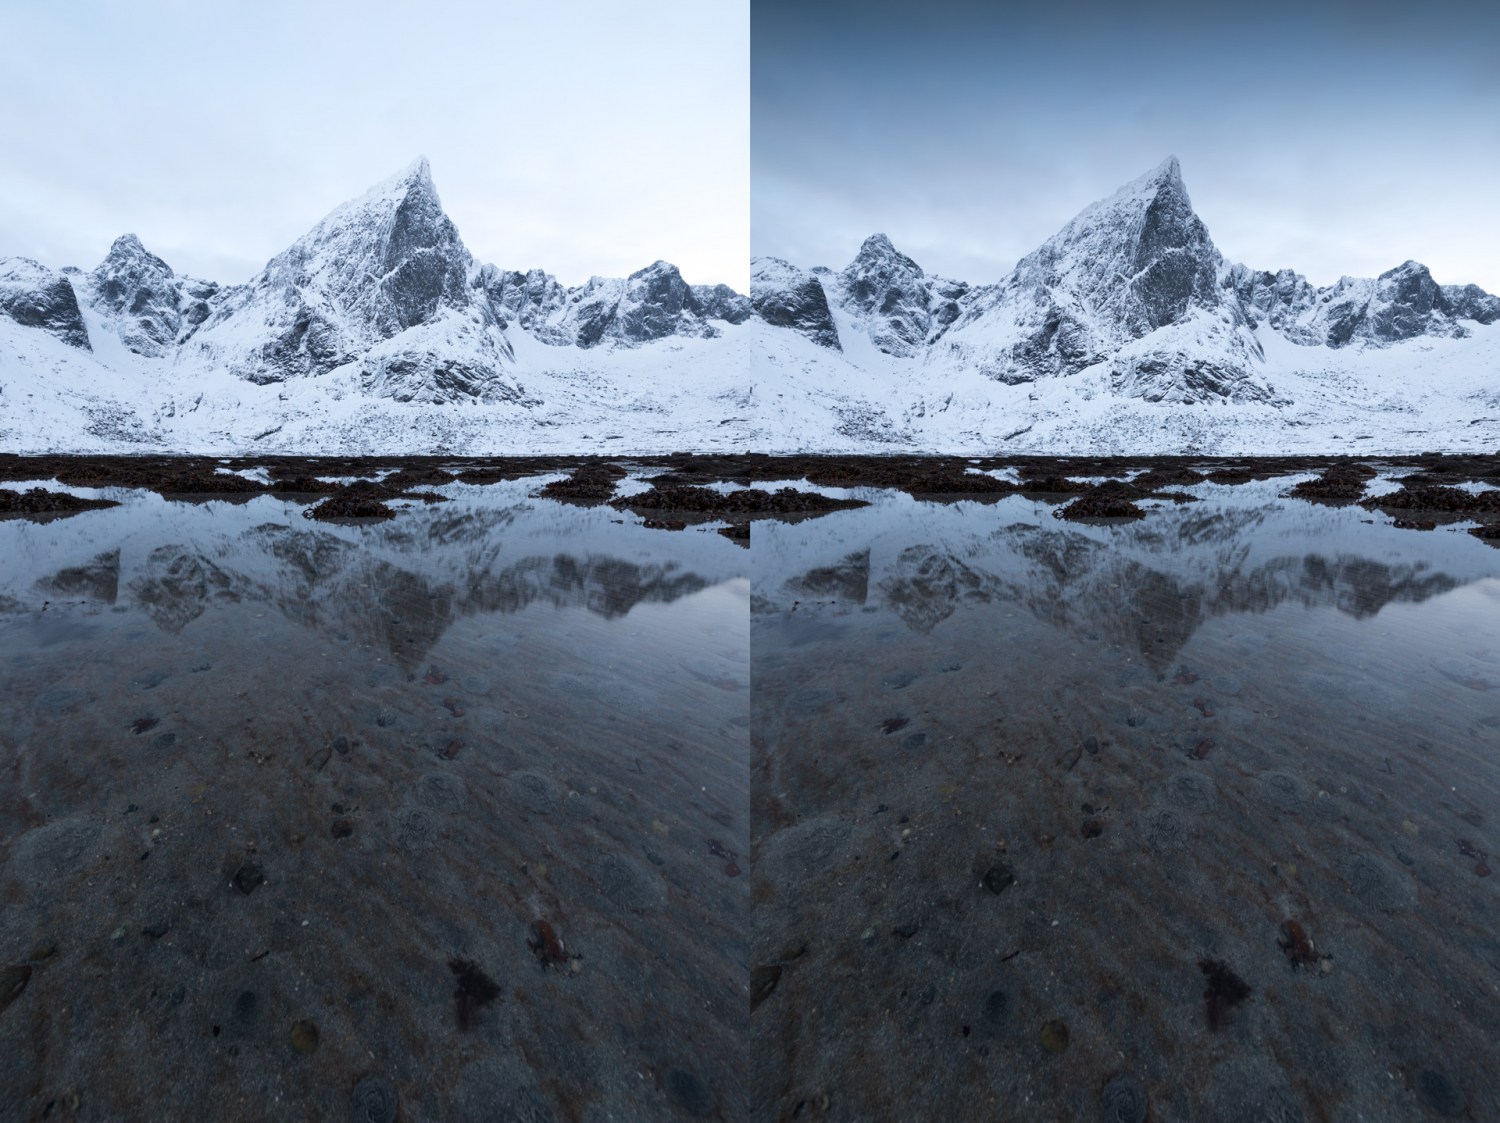
I tend to darken the sky a lot in my photography. This helps me guide the viewers’ eyes towards the important part of the image and strengthens the composition
This is quite easy to do and by using soft graduation such as explained above, it can be applied even when there are mountains or other subjects projecting the horizon, without looking strange.
Click and drag the graduated filter such as explained above, and place the middle transition line at the top of the frame. Adjust the bottom line in such a way that the adjustment is added only to the parts you want. Then lower the exposure. Since the transition is so smooth, I often lower the exposure down to -4.0 without it being too dark. Of course, this depends on how dark the original file is; you don’t want it to be completely black afterward.
Add a cold tone to foreground and sky
Color is an important part of the composition and that’s something that many tend to forget. Our eyes are naturally drawn towards the warmer tones but, unfortunately, nature doesn’t always let us capture that in the file. So to further enhance the main subject, I often add a cold tone and desaturate certain areas of the image. These areas quite often include the lower and upper part of the frame.
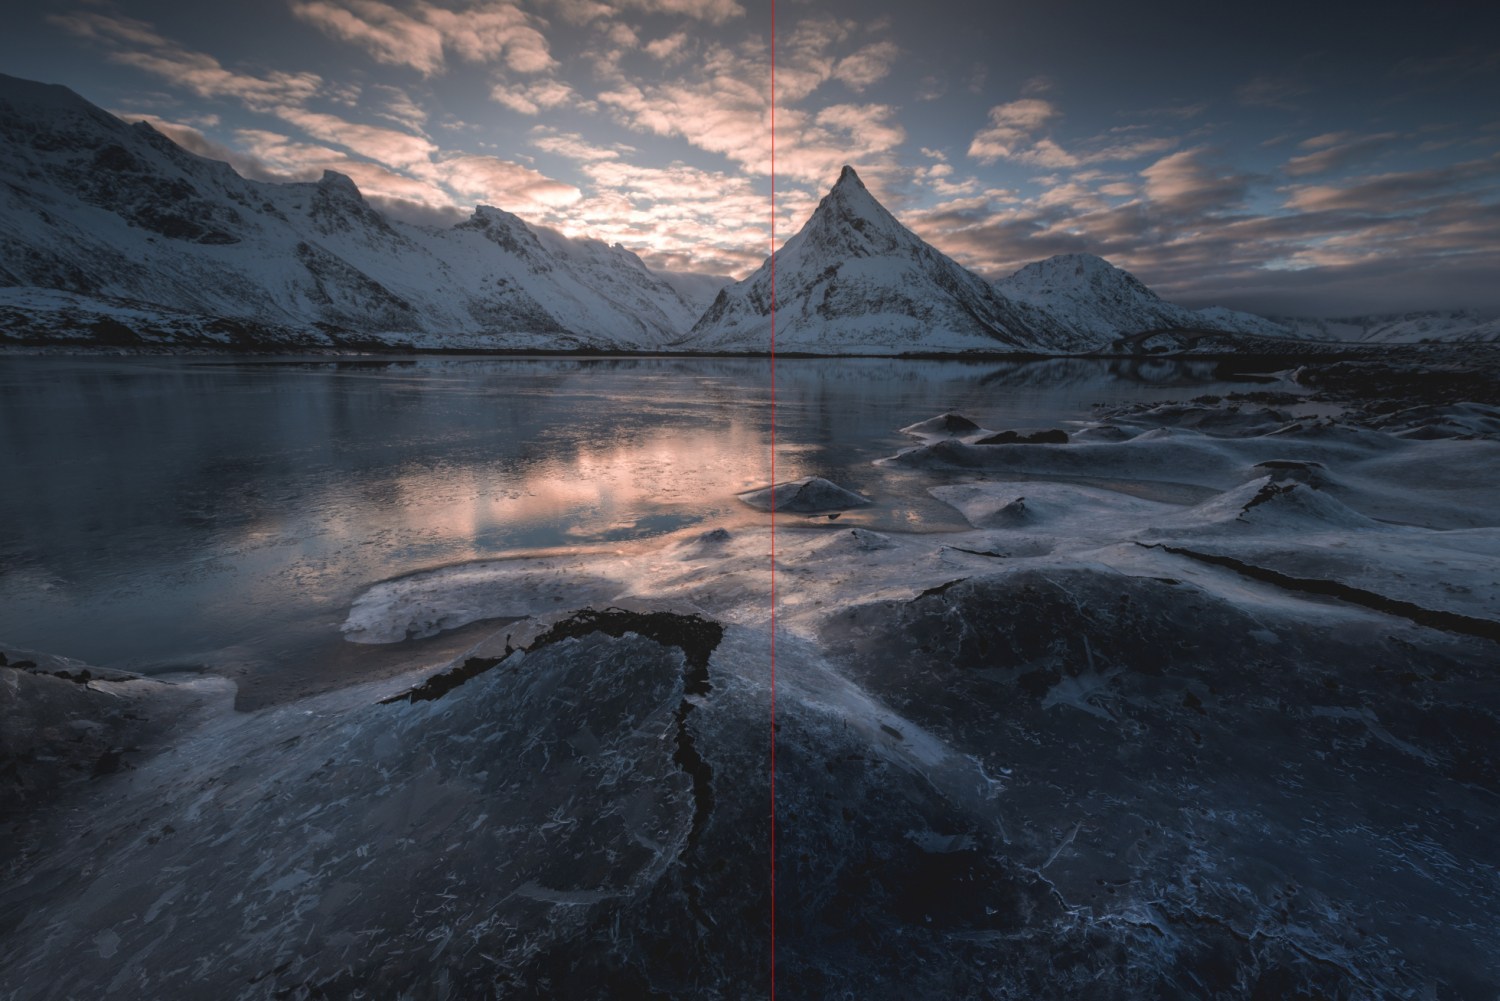
Using the graduated filter the opposite way works quite similar. The only difference is that you drag from the bottom up instead of top down. Then, just as before, adjust the filter to your likings. I tend to only desaturate and add a cold tone to the very bottom of the frame.
Sharpen & increase Clarity
The fourth and final feature is sharpening and increasing the clarity by using the graduated tool. This could be done either to bring out details in a nice cloudy sky or to increase clarity in a vibrant foreground.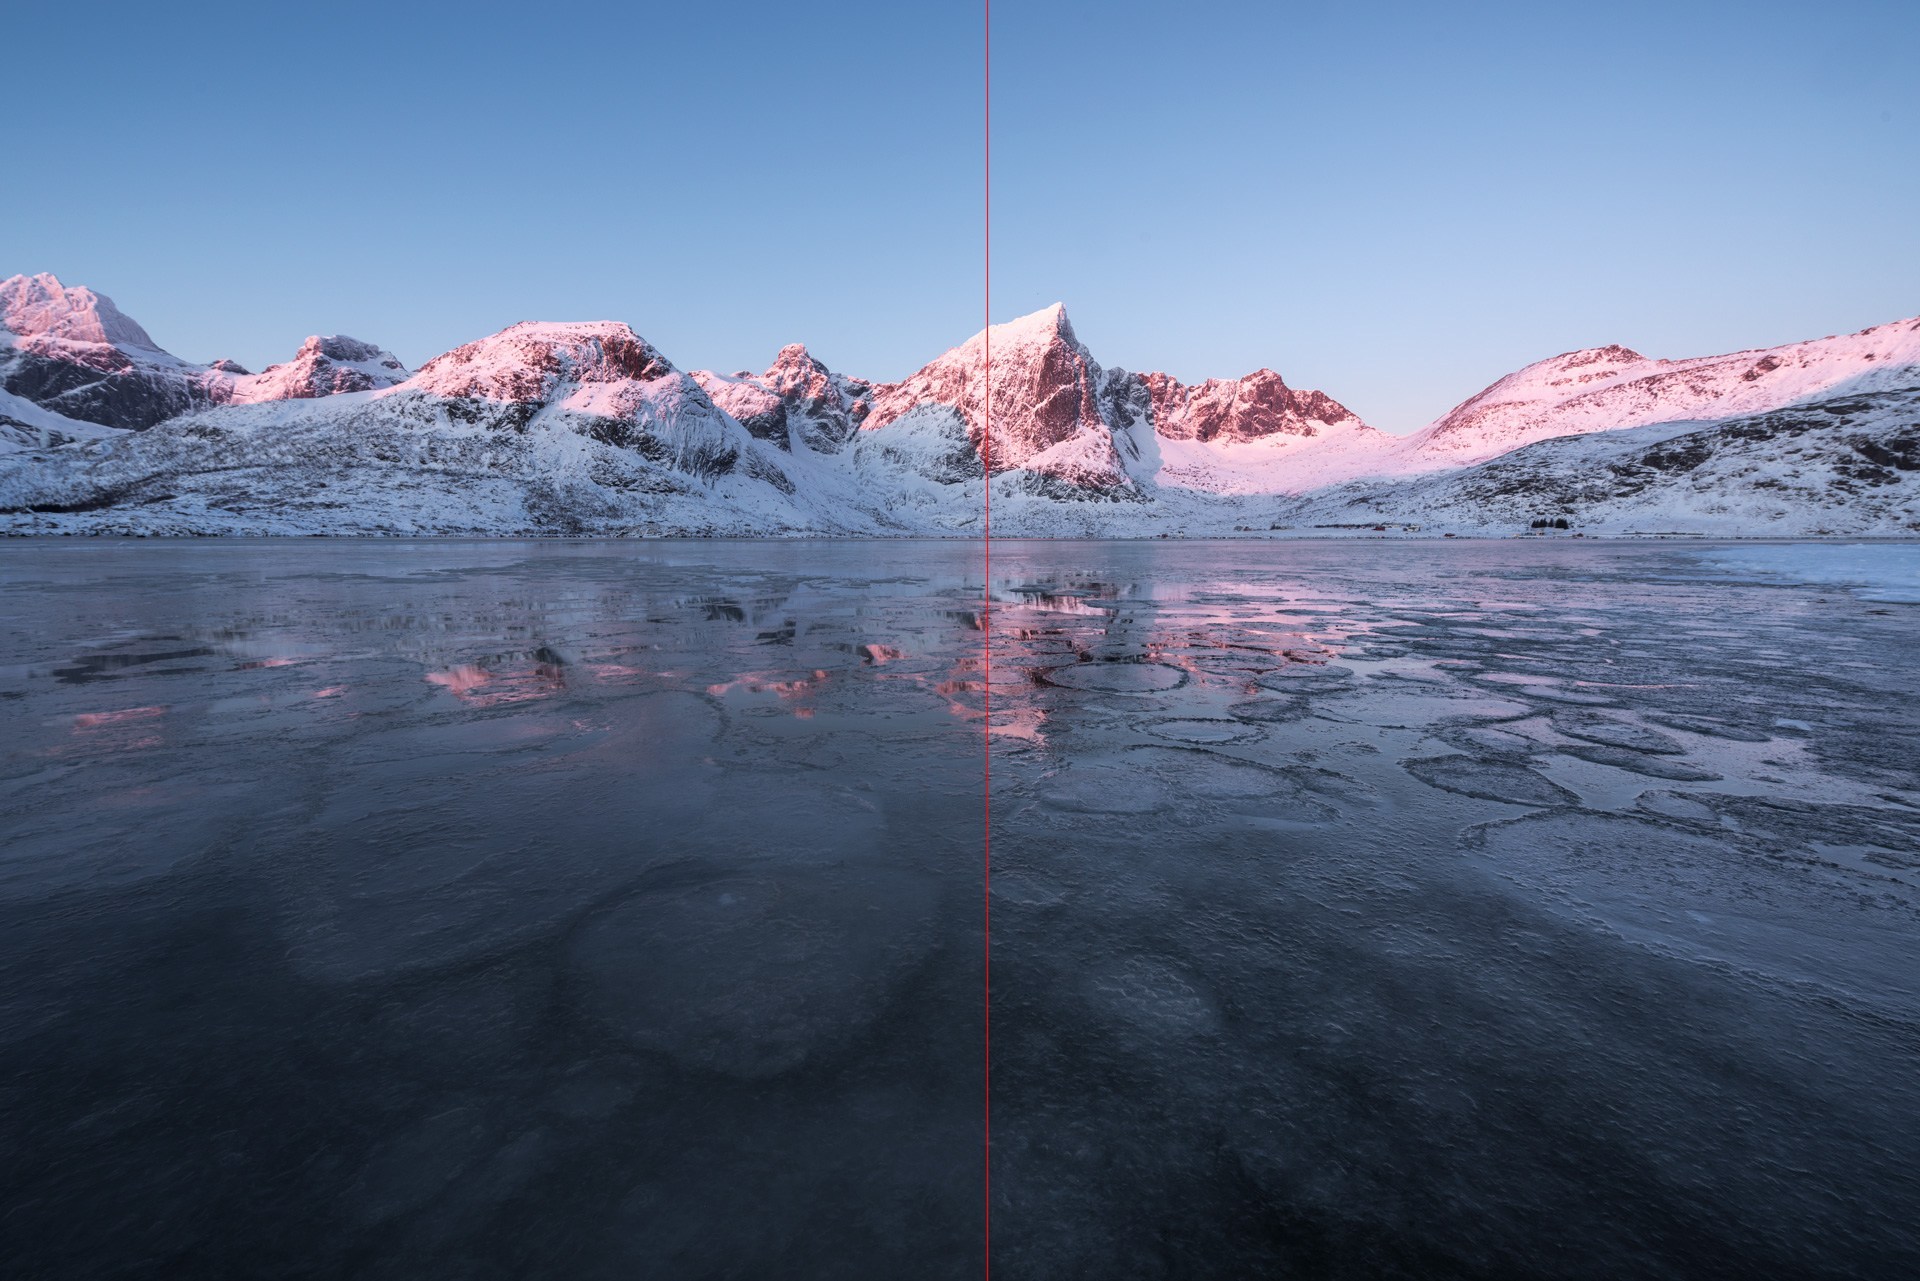
I’m generally not a big fan of the Clarity slider so even though I’m still using a soft transition I gently increase the slider; I don’t want to add +100 clarity regardless of how soft the transition is. Increase the clarity gradually by clicking on the number next to the slider and holding shift plus tapping the up arrow until you’re satisfied with the result.
Last words
There are many ways to use Lightroom’s Graduated Tool. The examples above are just a handful of ideas what you can use it for.
Truth be told, I use several Graduated Tools at the same time. It’s not uncommon that I use one or two for the sky, another couple for the foreground and perhaps a few more to create a small vignette. In the end, it depends on what you want to do with the image!

 Italiano
 Deutsch
 Español
 Português
 Français