
 Italiano
 Deutsch
 Español
 Português
 Français


04 / Mar, 2019
Comment 15892 Views How to Organize Your Photos In Lightroom
Category: Photography
Stars
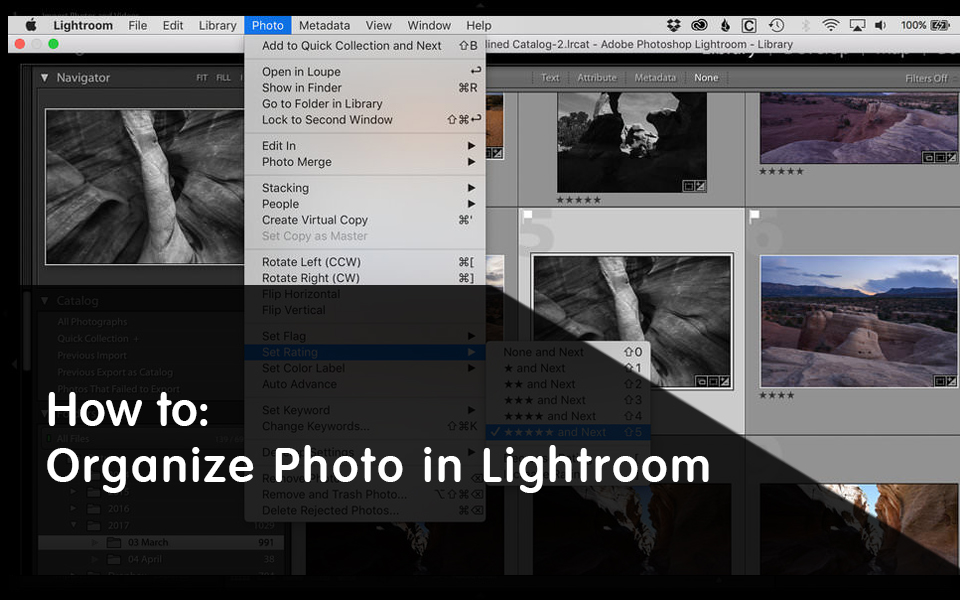
Like most photo organization software, Lightroom lets you rate your photos by giving them a “star” label. You can give a photo a rating from 1-5 stars, or you can leave it unrated.
The easiest way to do this is just to click the number on your keyboard corresponding to the stars you want to give. Technically, you can do the same by going to Photo > Set Rating > Five Star, but that’s way more complicated than necessary.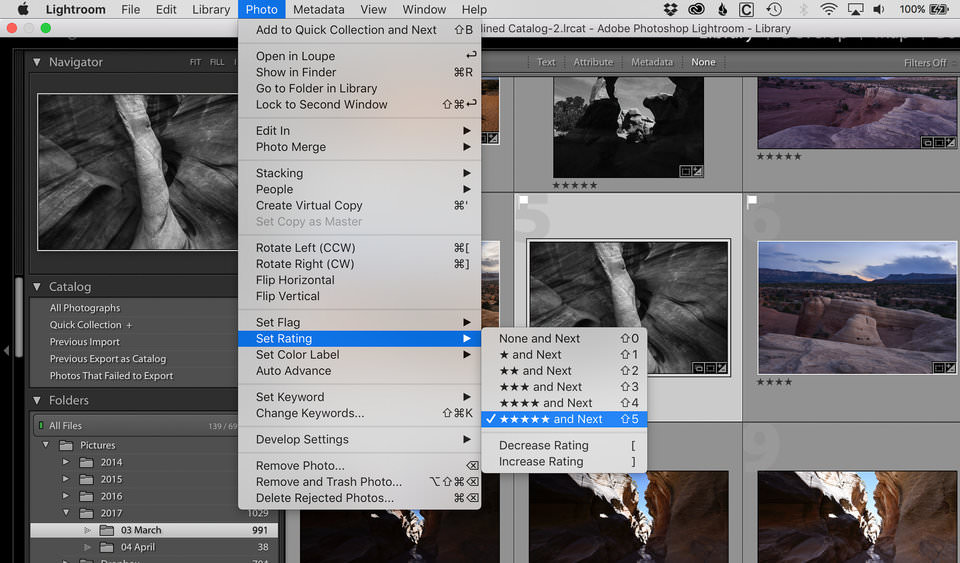
Flags
Flags are just like stars, but without as many options. You can flag a photo as a pick — one that you like — or flag a photo as a reject. And, of course, you can also leave a photo unflagged.
Personally, I use the flag options quite often. When I’m loading photos, and I think that I want to delete an image, I flag it as a reject. Then, later, I look through all my rejects and decide if any of them are worth keeping.
To flag a photo as a pick, click “P.” To flag it as a reject, click “X” instead.
Color Labels
Another way to group your photos is to give them a “color label.”
This doesn’t actually do anything to the photos themselves. There’s no behind-the-scenes thing you can do with photos of a certain color label that you can’t do with others; like stars or flags, it’s just an additional way to give yourself a grouping that is easy to recognize later on.
Personally, for example, I tend to assign a red color label to a group of photos that I’m eventually planning to merge into a panorama. It just makes them easier to recognize later on.
Other photographers will label photos that they want to look through together at a later time — for example, giving a blue label to all the wedding photos that include the bride. This just depends upon your own style of photography — there is no right or wrong way to use labels in Lightroom.
To give a photo a color label, press 6, 7, 8, or 9 on your keyboard.
Keywords
If you want an easy way to find your photos later, consider giving them keywords.
This is exactly what it sounds like — you simply label your photos with a few useful terms that will help you find them at some point in the future.
To give a photo a keyword, you need to be in the Library module. On the right-hand pop-out tab, you’ll see an option called “Keywording.” Click on it, and type whatever keywords apply to a particular photo (separated by a comma).
Personally, I don’t use keywords much as a landscape photographer, but I know event and wedding photographers who find them invaluable. Whether or not you use them in the long run, it’s worth getting a feel for keywords and seeing if they might be valuable for your work.
Using the Filter Bar to Find Your Photos Later
Each time that you label a photo, you’re making it easier for your future self to find it again. The main tool that you’ll use to find your old photos is called the Filter Bar.
The Filter Bar lets you sort your photos by almost any characteristic: Star rating, color label, camera, lens, aperture setting, file type, and many more. As I mentioned earlier, the filter bar is a thin, gray bar near the top of your screen. If you don’t see it in the Grid View, click the “” button on your keyboard, or go to View > Show Filter Bar in the top menu.
If you remember a single aspect about the photo you’re trying to find — part of its file name, the month you took it, a range of ISO values you probably used — you can narrow down your search drastically by using the filter bar.
Say, for example, that you know that one of your old photos was taken with the Nikon D800e, and you gave it five stars, but you can’t find the photo anywhere. After going to the “All Photographs” folder at the top-left of Lightroom’s Library module, open the filter bar and start searching:
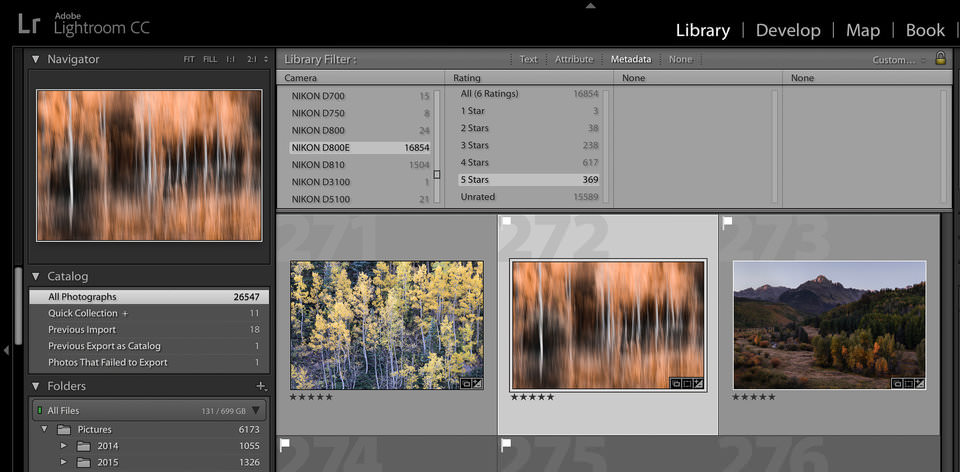
Here, I was able to narrow the search from 26,547 photos down to just 369!
I use this option all the time, whether to find missing images or to learn useful statistics about my shooting style (i.e., how many images I’ve taken with each of my lenses over time).
If you know how to use the filter bar in Lightroom, you should be able to find any photo that you’re missing. It’s a great tool to have at your disposal.
Adding Photos to Collections
My single favorite thing about Lightroom is the ability to add photos to collections.
What are Lightroom collections? Essentially, collections are similar to the file structure of the photos on your computer — except that they only exist in Lightroom, and you can add a single photo to as many collections as you want without a problem.
Here’s an example. Say that one of my photos is stored on my computer’s hard drive at Spencer > Photos > 2016 > 02 February. But say that I alsowant that photo stored in a folder called “Best Landscape Photos,” in a folder called “For Photography Life,” and in a folder called “Photos to Print.”
In the file structure on my computer, I’d need to duplicate the same image several times, taking up a lot of room on my hard drive. Plus, any time that I edited one of the photos, the other copies would remain unchanged! This is a clear problem — a clear problem that Lightroom’s collections fix.
Now, I can have a photo stored on my hard drive at Spencer > Photos > 2016 > 02 February, which will show up at the left-hand side bar in Lightroom’s Library module. But, at the same time, I can add it to a “Best Landscape Photos” collection, a “For Photography Life” collection, and a “Photos to Print” collection. This way, its actual file location remains unchanged, and I don’t end up duplicating the original photo at all.
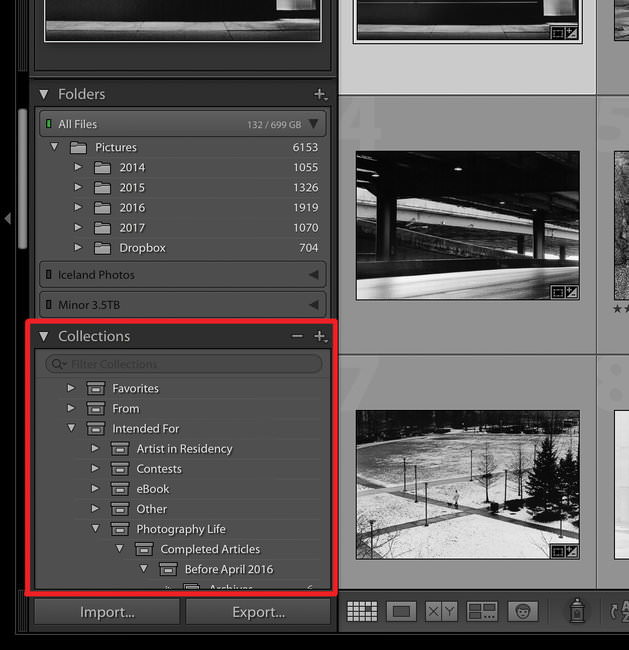
o keep your collections organized, you can group them into “collection sets.” Personally, for example, my favorite photos from Colorado are stored at From > Trips > Colorado > Best. (In this case, only the “Best” is a collection, while the others are collection sets.)
The beauty of this system is that you’re not creating duplicates of a photo each time you add it to a collection. A photo that’s in one collection takes up effectively the same amount of space as a photo that’s in five, twelve, or fifty collections! And, similarly, any edits you make to a photo in one of the collections are also visible in all the others. This is exactly how photo organization should be.
Virtual Copies
What happens if you want to edit one photo in multiple ways? Say, for example, that you like an image in both color and black and white — how do you keep two separate versions of the photo?
It’s actually quite easy: Create a virtual copy.
Lightroom’s virtual copies are exactly like duplicating a photo on your hard drive, except that it only happens in Lightroom, and it doesn’t double the amount of space taken up! Virtual copies are very useful ways to keep a variety of edits of the same photo without any significant storage penalties.
However, be wary of keeping several different virtual copies of your photo just because. It’s easy to have your virtual copies get out of hand, where you don’t know which one of them is actually the most up-to-date. Personally, I only try to create virtual copies when I need to keep a version of the photo that is vastly different from my original, and I won’t get confused between the two.
With that one caution virtual copies are a very useful tool (and you can read more about them here: How to Use Virtual Copies.) I end up using virtual copies relatively often, particularly for my main portfolio images. It’s a quick way to keep multiple edits of your most-used shots.
(For what it’s worth, if you’re trying to keep things simple, you may consider using Develop snapshots, which I mentioned earlier, to a similar effect. A virtual copy is essentially a Develop snapshot that appears more tangibly in your actual library.)
Smart Previews
If you store all your photos on an external hard drive, and you remove the external hard drive, you’ll actually still see those photos appear in Lightroom! They’ll just be very low-resolution previews, and they’ll have little exclamation marks at the top to indicate that Lightroom is confused:
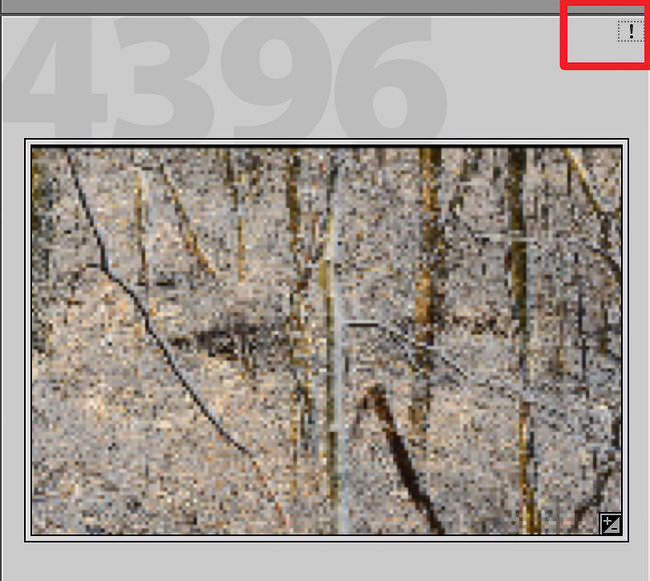
In the most recent versions of Lightroom, though, there’s actually a way to use these previews for something useful: creating something called a smart preview.
A smart preview is exactly what it sounds like: It’s a preview of your photo that acts as if it’s the photo itself. You can edit it, organize it, and export it without any problem — things that you cannot necessarily do with a normal preview.
Smart previews don’t replace your actual photo. They’re lower-resolution, for one, and they don’t actually show up on your hard drive. They exist solely within Lightroom’s catalog.
However, the benefit of smart previews is that you can edit them exactly like typical photos, and, when you reconnect your hard drive later, all those edits will sync back up to the original photo as if nothing happened.


