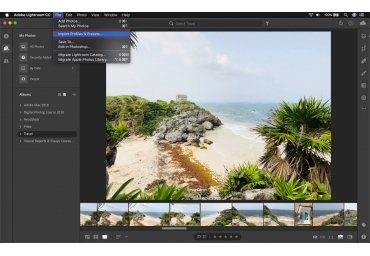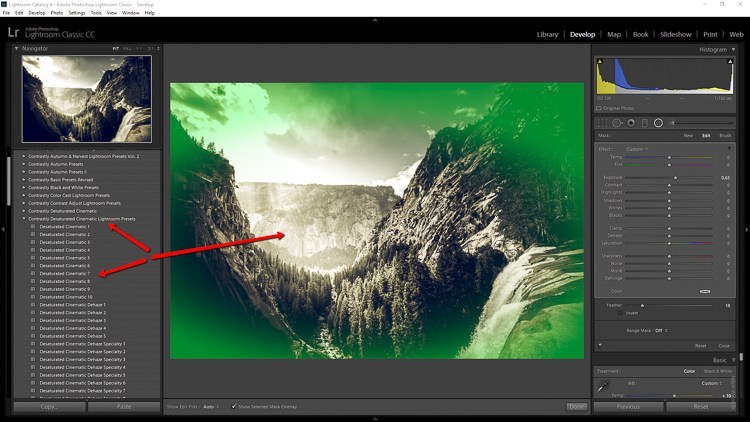
Where should I start when talking about Lightroom presets? The subject has been covered so many different ways by so many different writers that at times even I think there’s nothing left to say. Or is there?
Most of us already know that using presets in our photo editing workflow speeds up processing. I mean, who couldn’t use a little help now and again especially when you’re attempting to wade through six or seven hundred images from that last wedding where the groom couldn’t stop blinking.
Not only that, but perhaps my favorite part about using presets is the creative jumpstart they can give my work.
Like I said, you already know all this, right? So instead of droning on about how to make presets or export them or download them, we’re going to discuss a seldom mentioned topic; how to get the most out of the presets you already have and use.
Designate Import Presets
Lightroom presets are surprisingly versatile and can be applied to some extent literally during every phase of your processing in Lightroom. One of the most underutilized applications for Develop Presets happens at the very first phase of editing, importing the image.
Any Develop Preset you might have in your processing treasure chest can be applied with the click of the mouse to each image you import.
Do you have a lot of photos from that Blinker wedding I mentioned earlier? Try making a preset that works exclusively for each sequence of photos. Do you find yourself using similar contrast or clarity all the time? Apply the appropriate preset upon import to save time later. It’s almost too easy not to do.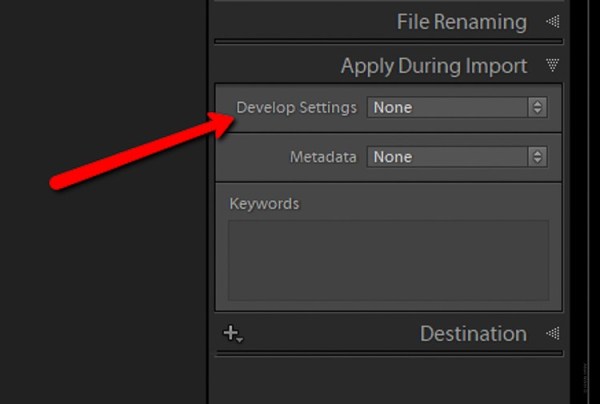
And import presets aren’t limited to the just the develop variety either. Perhaps even more useful are metadata and keyword presets that can be applied at the same time. You can do that directly below the develop preset drop-down on the import screen.
Avoid Conflicting Presets
When I’m not off making photographs on some remote mountaintop you can generally find me sitting at the computer making presets. As the lead developer of presets for Contrastly.com I’ve single-handedly manufactured over 1,200 presets for Lightroom.
Even after making so many I still sometimes run into the hair-rippingly frustrating situation, when one of my presets overrides edits that I’ve already made to a photo. What usually causes this is when I forget to uncheck an edit box I didn’t adjust in the “Save Preset” window when saving my new preset.
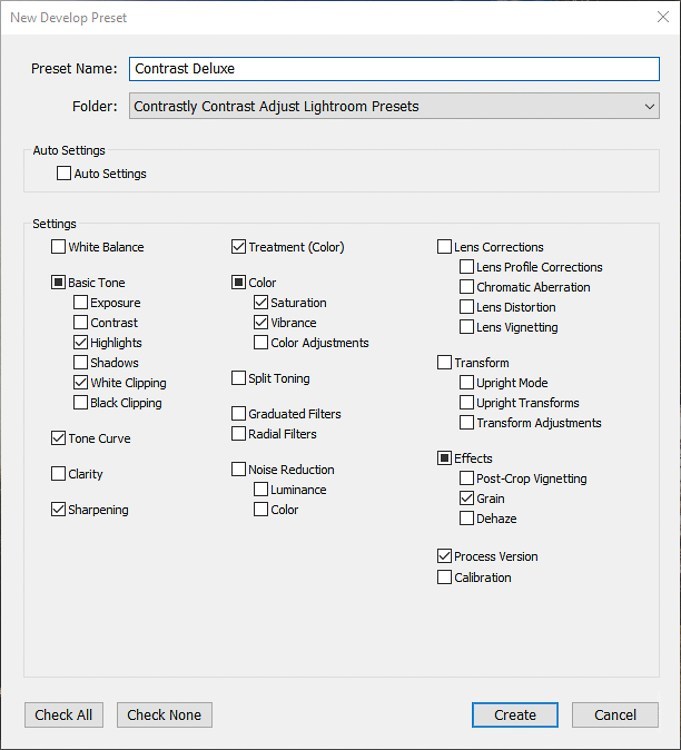
In order to save yourself a little grief, always – and I mean always – remember that when you make a new preset only save (check off) the edits you’ve actually made. NEVER (requisite shouting) leave a box checked even if the value is zero.
The reason for this is that even if an adjustment slider is set to zero checking the box will save that slider to zero in your preset. This means that if you have a preset that only affects the tone curve and you leave all the boxes checked all the other edits you’ve made will be reset to default by the Lightroom Preset. Sad times.
Don’t Stop at the Presets
Like I said earlier…I’ve made a lot of presets and I hope that they help people get the most out of their photos. Yet if there’s one thing that I sincerely hope my presets don’t do is become an endpoint.
Presets are a ladder. Don’t simply apply a preset and hope for the best. Most presets are intended to be post-processing workhorses and/or springboards for your creativity. In either case, don’t stop at the preset. Even though the stars sometimes align and a preset might hit the bullseye with a single click, don’t be afraid to change things around.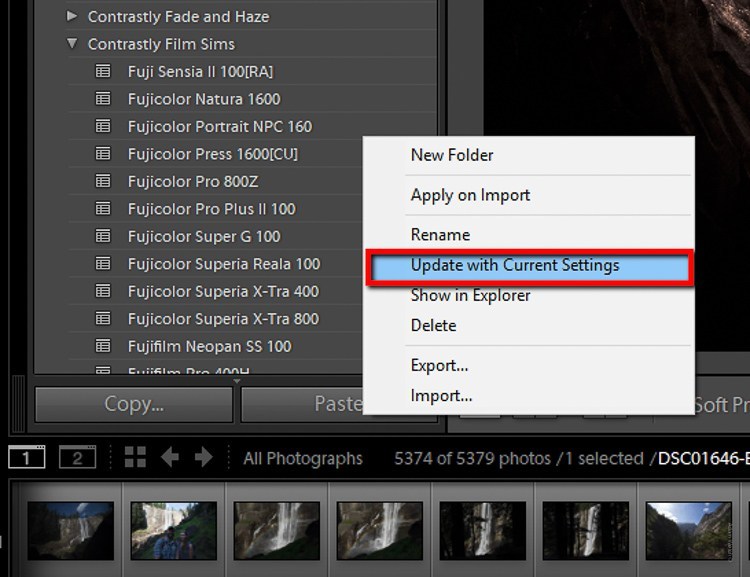
As you test out presets feel free to update the settings or create a brand new mutant preset based on the edits you see before you. Some of my personal favorites the ones I’ve engineered to simulate expired film and vintage cinema.
Almost every time I narcissistically employ one of my own presets I find myself adjusting and tweaking until I have something completely new that I end up saving as a fresh preset. The process becomes cyclic. This is how great presets are born.
Final Reminders…
Lightroom presets are an old standby in the post-processing world. Oddly enough, not everyone uses them to their full potential. Making, saving or downloading Lightroom presets is only the first act in a great play.
Remember the value of import presets for speeding up your editing from the beginning. When making your own presets always remember to select only the aspects of the development that you’ve adjusted and not any zeroed out sliders. Don’t be afraid to change presets, especially the ones you’ve paid good money for, in order for them to better fit your own creative vision.
And most importantly, never allow yourself to simply stop at the presets…well, most of the time. Get the most out your presets by making them your own. Allow your presets do most of the heavy lifting if need be, while always following your own direction.

 Italiano
 Deutsch
 Español
 Português
 Français