
 Italiano
 Deutsch
 Español
 Português
 Français


04 / Mar, 2019
Comment 19947 Views How is Lightroom Arranged: Library and Develop modules
Category: Photography
Lightroom is divided into two main sections: the organization half, and the post-processing half.
These two core features are separated from one another when you’re looking at a photo in Lightroom; you can’t see all the organizational features and all the editing features at the same time. To organize your photos, you need to enter the Library module. To post-process your photos, you need to enter the Develop module.
On top of the Library and Develop modules, Lightroom also has a Map, Book, Slideshow, Print, and Web module. Each one does, roughly, what it sounds like. If you want to pinpoint the GPS coordinates of a photo you took, for example, you’d need to open the Map module.
The most important modules in Lightroom though, by far, are Library and Develop. Very few photographers will use the other modules just as frequently. So, how do the Library and Develop modules work? I’ll give an outline below:
The Library Module
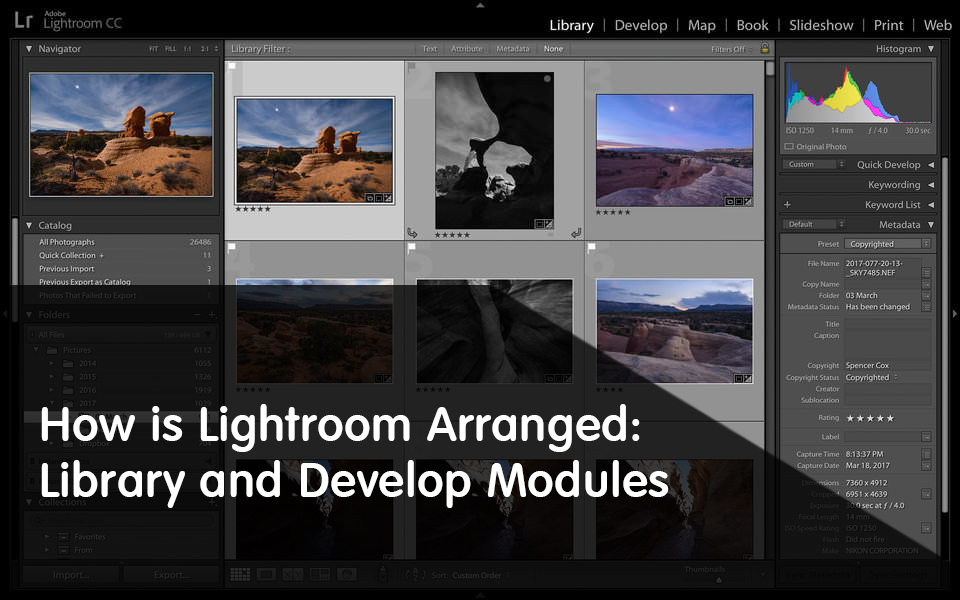
You’ll notice upon entering the Library module that it looks something like this: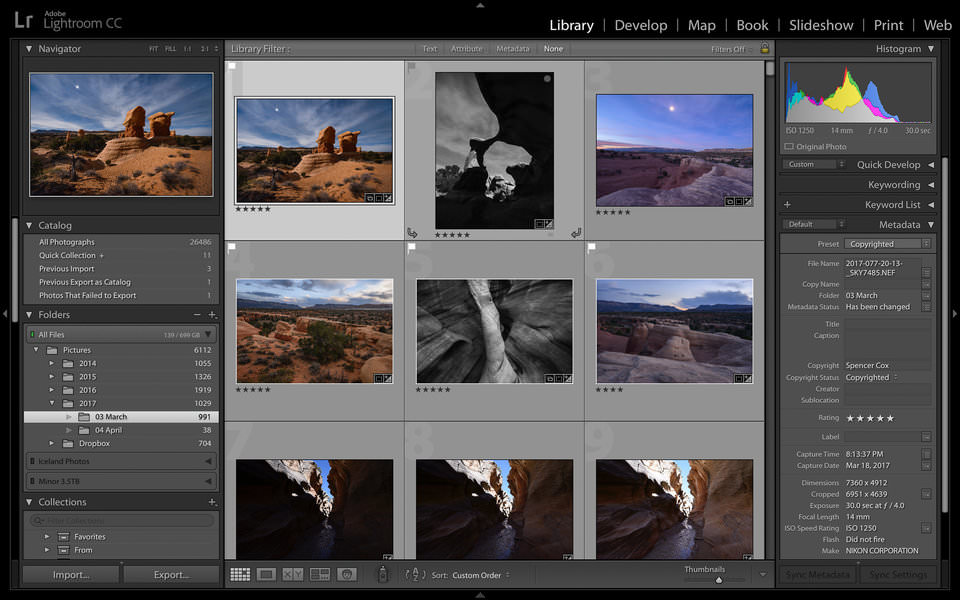
What do all the pop-out tabs do? I’ll cover each one below:
1. The Left-Hand Tab
Along the left-hand side is the actual file structure on your computer. (If you don’t see it, press the “tab” key on your keyboard, or click the inward-pointing arrow along the very far left.) In the example above, you can see that the photo I’ve clicked is tucked away in my Pictures > 2017 > 03 March folder.
Near the bottom of the screen, still on the left-hand side, you can see a label called “Collections.” I’ll get to that in a bit, but here’s a spoiler alert: The “Collections” section of Lightroom is very important. For many photographers, it forms the backbone of their organization structure. I’ll cover it in more detail later.
2. The Top Options
At the top of the screen, below the Library/Develop/Map/etc. modules, is a thin gray bar called “Library Filter.” If you don’t see it, press the “” key on your keyboard, or go to View > Show Filter Bar. Another spoiler alert: This unassuming tab is the main tool at your disposal if you ever lose a photo and are trying to find it again.
3. The Right-Hand Tab
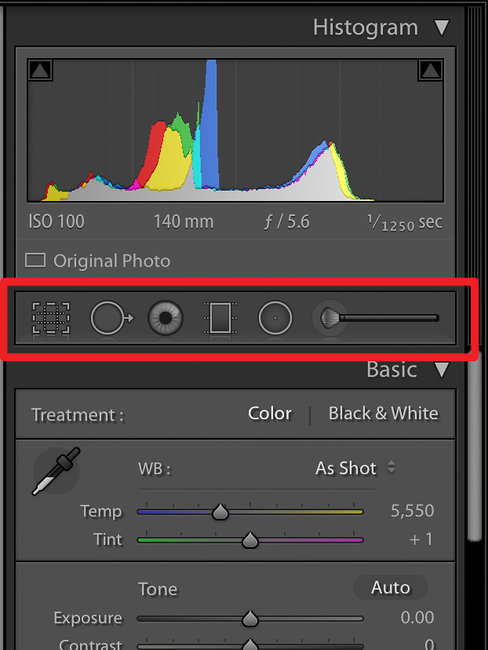
On the right-hand side of your screen is another pop-out tab. This one has a few more options — Quick Develop, Keywording, etc. — and exists mainly to give you information about your photos. The most useful of these options is the “Metadata” section, which lets you look at the behind-the-scenes information about your photos. I use this whenever I’m trying to see when I captured a photo, or if I used exposure compensation, or if I used a particular camera/lens rather than another. At the top of the right-hand tab, you can see a summary of this information, as well as a histogram of the photo you’ve selected.
4. The Toolbar at the Bottom
Another important option is at the bottom of your screen. Lightroom calls this your Toolbar. (If it doesn’t appear, press “T,” or go View > Show Toolbar.)
The Toolbar lets you choose how your photos look within the Library module. They could be a set of thumbnails, a single image that fills most of the screen, or a comparison of multiple photos that fill part of the screen. Those options can be seen in the screenshot below:
The thumbnail view — the icon on the far left — is also known as the Grid View. This one is useful if you’re trying to scroll through several photos at once.
The Loupe View is next. It partially fills the screen with your photo, keeping the sidebars open in the mean time. It’s nice if you want to look at each photo in more detail, though I tend to prefer the full-screen view that you get by pressing the “F” key. (In older Lightroom versions, press the “L” key instead, or just go to the top menu: Window > Screen Mode > Full Screen Preview.)
There are also Compare and Survey views if you want to compare multiple photos against one another at the same time. And, if you take a lot of photos of people, you might find the People view — where Lightroom tries to find people’s faces and group them together — to help for certain shoots. I don’t tend to use these views, but you might find them useful depending upon your work. Feel free to experiment.
Also, for what it’s worth, the tools you’ll have at your disposal in the Toolbar will change depending upon which of these options you click. If you enter “Loupe View,” for example, you’ll be able to give your photos a star rating, which isn’t in the Toolbar in the other views (though you can do this at any time just by pressing a number, 1-5, on your keyboard).
5. The Filmstrip Pop-Out at the Very Bottom
Finally, there’s one more pop-out tab that we haven’t examined yet: the “Filmstrip” at the very, very bottom of the screen. If it doesn’t appear yet, you’ll need to click the upward-pointing arrow at the bottommost point of Lightroom:
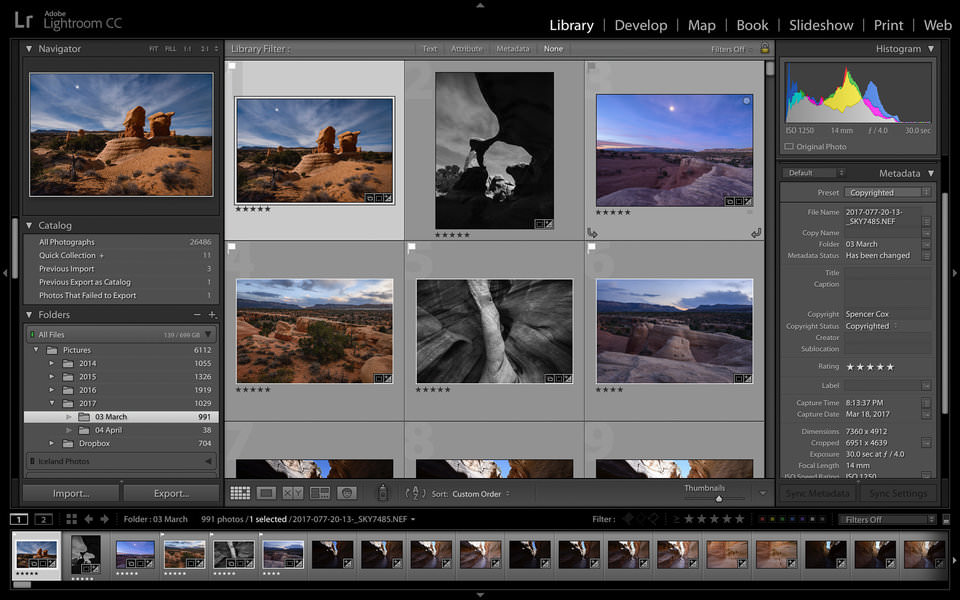
This lets you look at a miniature version of each photo along the bottom of your screen. It can be useful in certain occasions — say, you’re in the Loupe View (again, looking at a single photo at a time) and you want to go quickly to a photo that is much later within the same folder. I don’t use the filmstrip much, but it may be useful for your work.
The Library module does more than just let you view your photos, though — it also lets you organize them. I’ll cover that in a moment, but I’ll give a quick overview of the Develop module first.
The Develop Module
Editing your photos is one of the crucial steps of photography. It is particularly relevant if you shoot with your camera’s RAW mode, in which case you’re likely to end up with photos that are low-contrast and low-saturation immediately out of camera. That’s where the Develop module in Lightroom can help.
Lightroom’s Develop module looks like this: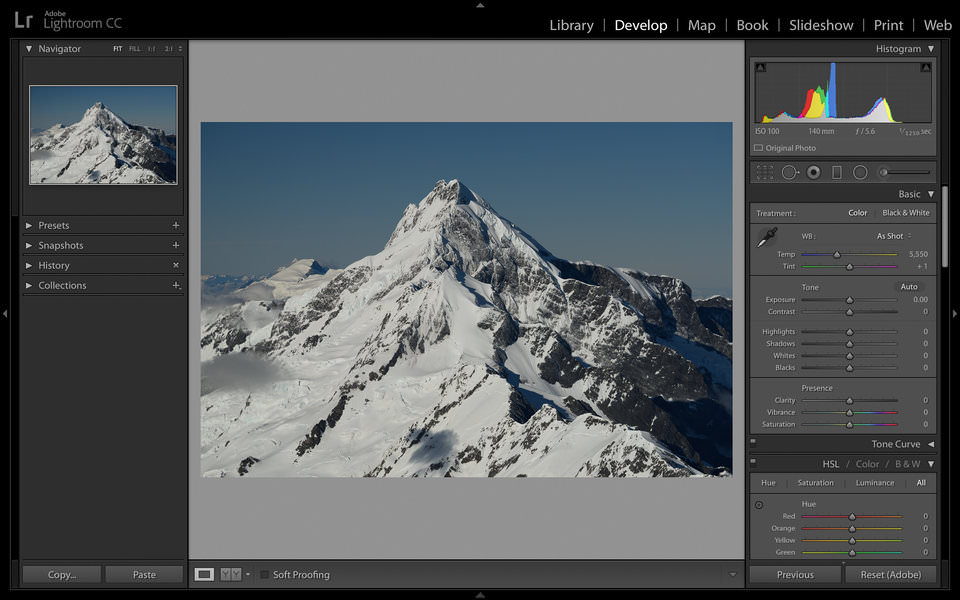
Once again, I’ll cover what each of these pop-out tabs does below:
1. The Right-Hand Post-Processing Options
As you can see, there are plenty of post-processing options at the right-hand side of the screen. Most of those are considered global adjustments — in other words, they affect the entire photograph at once.
The other category of adjustment is called a local edit; it only affects part of your photo. The options at the top of this sidebar are the local edit options:
You’ll end up using this right-hand sidebar far more often than any of the other options when you’re post-processing photos in Lightroom. It’s the home base. Almost any time you want to make an edit, this is where you’ll go.
2. The Left-Hand Tab
The other crucial tab in Lightroom’s Develop module is the left-hand tab. This section has a few separate options that are each equally useful.
First is the “Presets” section. This lets you apply a set of pre-fixed edits to your photos. Since every photo is different, why would you want to do this? Personally, I have a sharpening preset that I apply to most of my photos. Since most of my photos are taken at similar ISO and aperture values, I tend to use the same sharpening settings frequently — and this just quickens the process.
Next is the “Snapshots” section. A snapshot is a way to remember the exact post-processing settings you used at a particular point in time. If you like the look of an edit that you made, and you want to return to those settings easily (i.e., without undoing all of them manually), you can take a snapshot and return to it at any time.
The “History” option is next, and it’s a very useful one. Here, Lightroom essentially takes a snapshot every time you make an edit. So, you can go back, chronologically, to see how the photo looked at any point in its history. I use this all the time to compare my recent edits to an earlier version of the photo. However, if you’ve made a lot of edits to a particular image, this section can get crowded and difficult to navigate exactly where you want.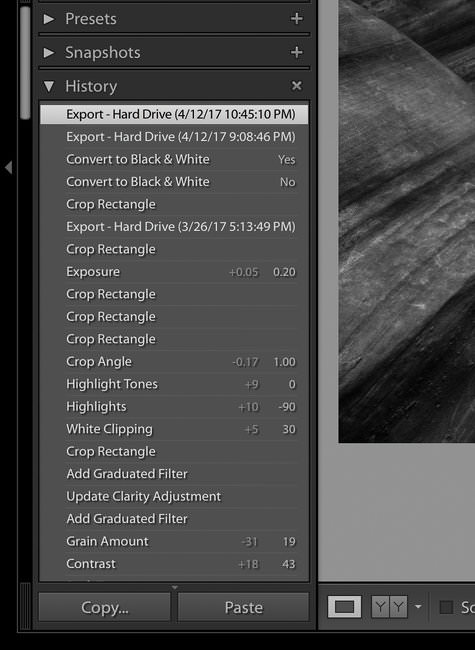
Finally, the “Collections” option is last. As I mentioned earlier, this section also appears in the normal Library module, and I’m not sure that it’s totally necessary here. But, if you have the filmstrip pop-out enabled, you can drag any photo you want into any Collection you want, even within the Develop module. Some photographers may find that useful.
3. The Develop Toolbar at the Bottom
The last part of the Develop module’s layout is the toolbar at the bottom. There are only a few options, and you won’t end up using them very frequently.
The first option is the view mode of the Develop module. You can view your images with a single photo taking up the screen — which is the most typical way to use the Develop module — or with two photos taking up the screen. In this case, the second photo is the original appearance of the photo out-of-camera.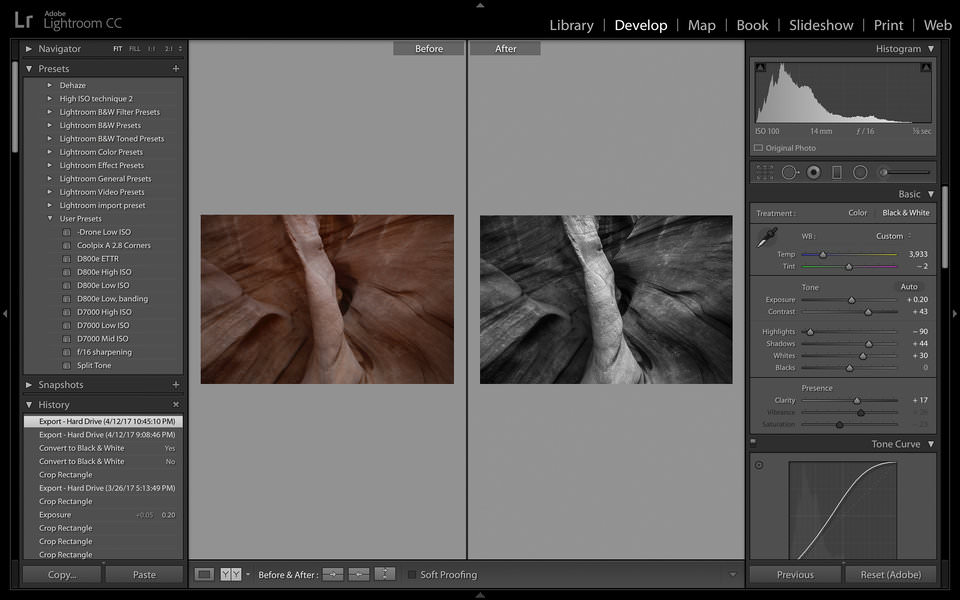
This can be useful if you’re trying to see how drastic your edits were, but it’s not something that most people use very often. You can do something similar, without showing both photos at once, by pressing the “” key on your keyboard.
The other option in the Toolbar is called “Soft Proofing,” and this is a relatively advanced topic. If you’re trying to print a photo, it can be difficult (i.e., really difficult and expensive) to get the colors/contrast/brightness of your image to look exactly the same between your screen and your print. The Soft Proofing option lets you load profiles from your printer and see, roughly, how the photo will look when printed.


