Italiano
 Deutsch
 Español
 Português
 Français


01 / Mar, 2019
Comment 20201 Views How to Turn Autumn into Summer in Lightroom and Create Light Effect in Photoshop
Category: Photography
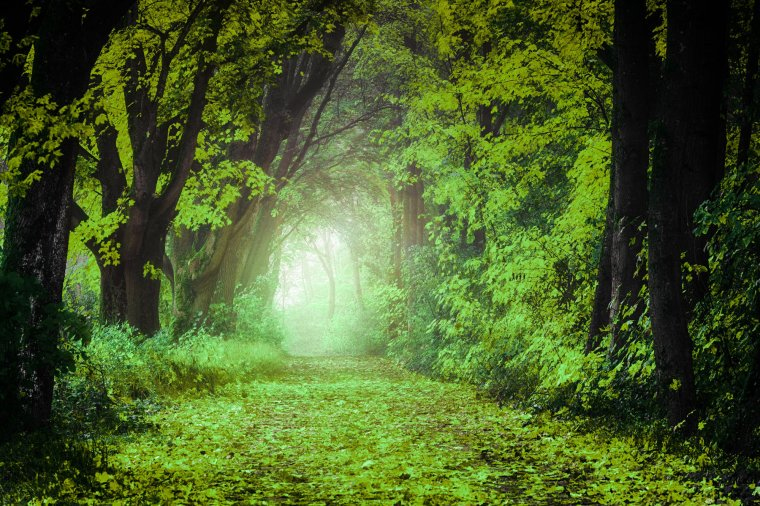
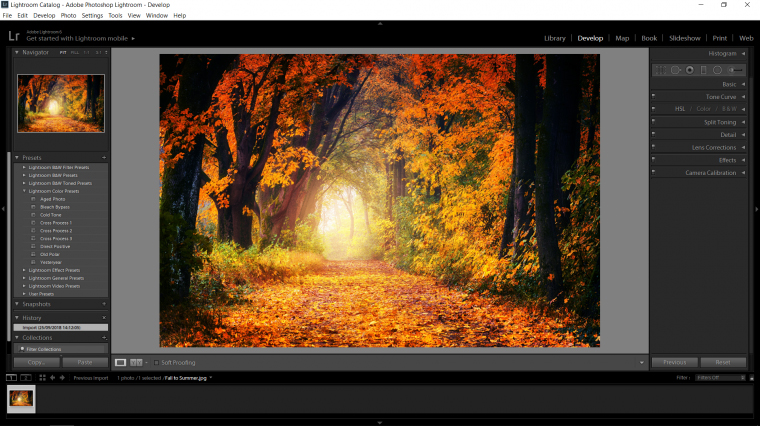
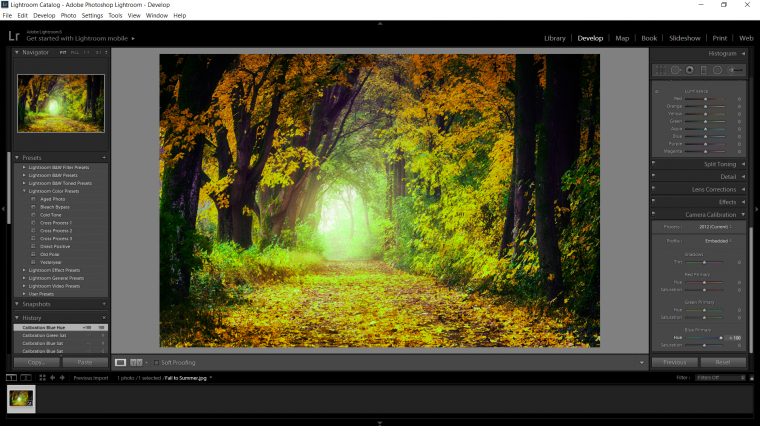
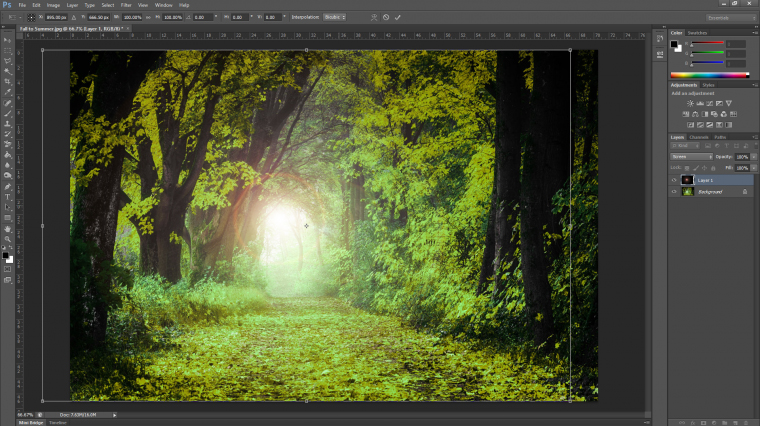
As you can see for an autumn picture this looks great, beautiful colors and that nice little bit of mist at the top of the path,but how can we change this to summer.
The Tools that we will be using is a combination of twoso just go to HSL tab and start to play around with the individual colors sliders.
So in that section, you have 3 further sections, "Hue" which is your base color, so red, green, etc. Then you have "Saturation" this is where you are either make the color ridiculous bright and unrealistic looking or go the opposite way with the slider and start to drain the color out of the image making it a more grey looking color, this section is good for dulling a color down darkening it and making it look more off in the distance when you drain the color out and then lighten it, but we'll not get into that to detailed as that can be an entire tutorial by itself.
Then we have "Luminance" which is like or the same sort of as "Vibrance" in Photoshop, so what this will do is to Brighten your color or Darken it down.
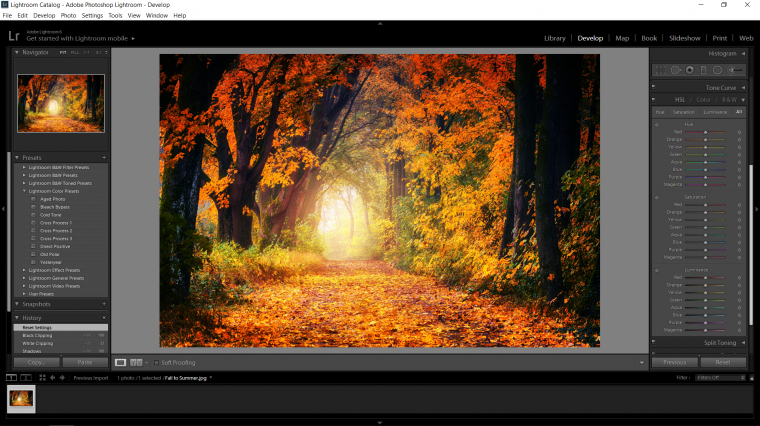
The problem with this is that it picks out just one color, and just changes that one color to darker lighter or saturated, and we want to change the color totaly.
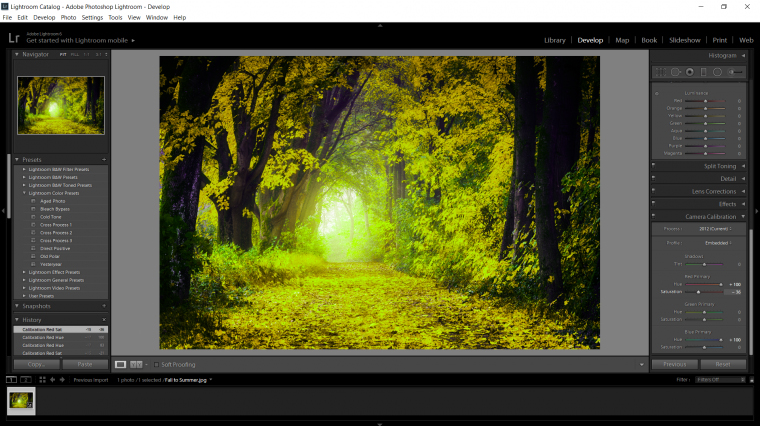
So to do that we have to use Camera Calibration in combination with the HSL tab.
Now wait to you see how fast you can do this.
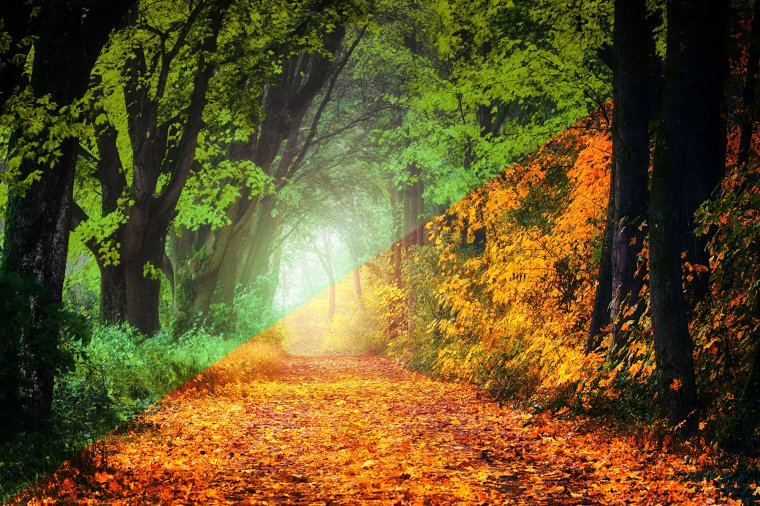
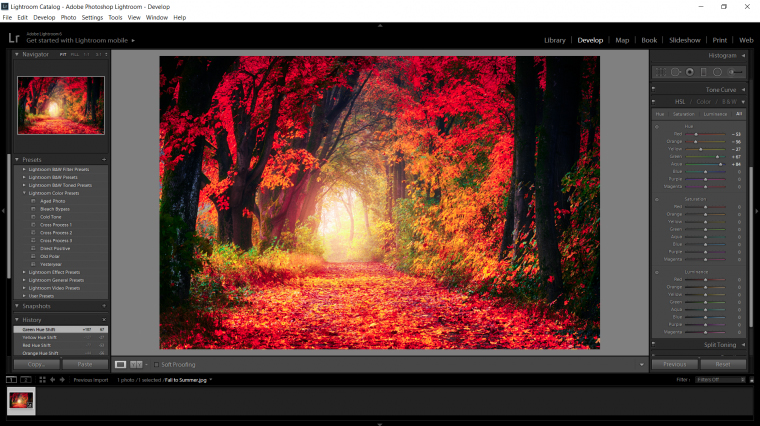
First - go to grab the Blue Primary slider down at the bottom right-hand side there and !'m going to move it all the way to the right -hand side until it hits +100, and already you will see a huge change in the image, everything that was Autumn or just about has now taken on a beautiful green color, amazing!
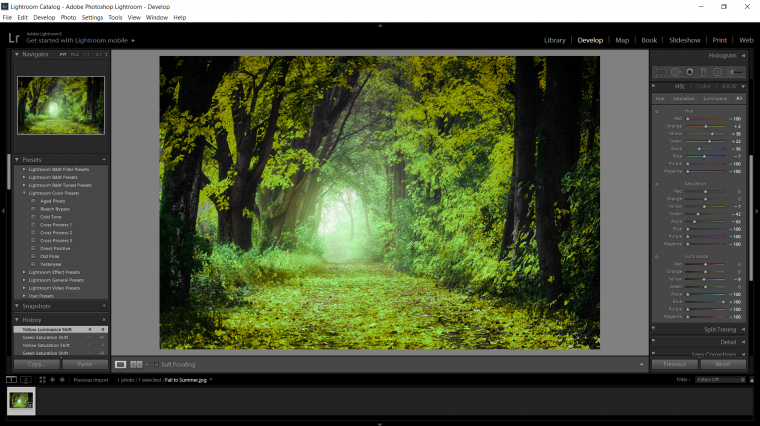
So you will now be seeng an image that more resembles a summer looking forest, but there is still a few things we can do, especially if your image is like mine and some of those leaves didn't fully convert to Green and there's still some pesky Autumn colored leaves there, to be fair it's not really such a big deal but it would be nice to fully convert the entire image wouldn't it?
The way I'm going to counter that is to go to the Red Primary and move the slider of that to the right until I see the Red nearly disappeared, just br careful that it doesn't look too unreal which can happy, so to neutralist that a little I'm just going to slide the Saturation of the Red Primary to the left a little just to drain that color a little.
Also, the Green is a bit too strong too.I also see that the trunks of the tree and now a little bit too blue for my liking, so what we are going to do?
I'm guessing you got it, we are going to go to the HSL section again and start to play with the colors now that we have replaced the Autumn Reds with the Greens.
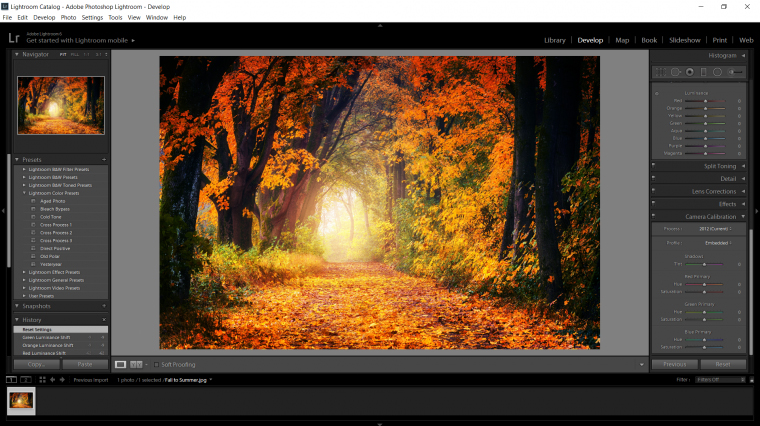
So my only real advice here because there will generally be a difference between every picture you do. What I did here was I had one rule, it has to look real! So I went through each slider and just through trial and error I went through each color just to see how it would look, if it was too brite I brought the Saturation down.
I did concentrate on the tree a good be too, I felt the trunks were too purple and blue, so I brought the saturation down a good bit, if you look at a lot of trees in real life, they are not brown as such, but they lean heavity grey.
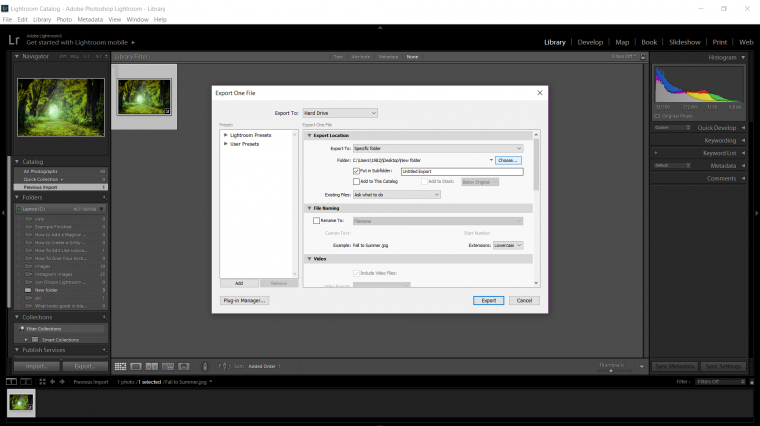
Next, I'm going to save my image so I can opent it up in Photoshop.
To save in Lightroon, you have to Library, you find this tab at the top right habd side beside Developer.
Then you click on Export at the bottom left.
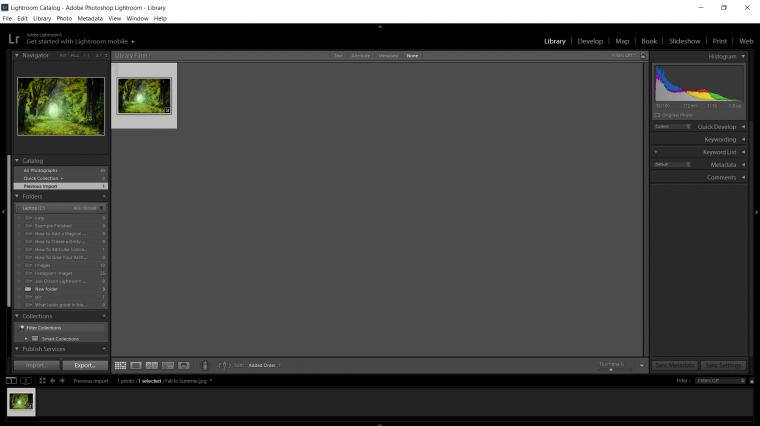
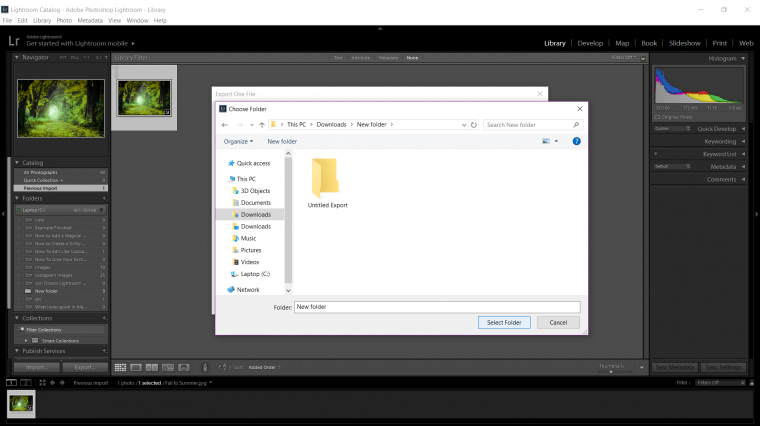
Choose the Folder you want to save your file in, and then click on Export.
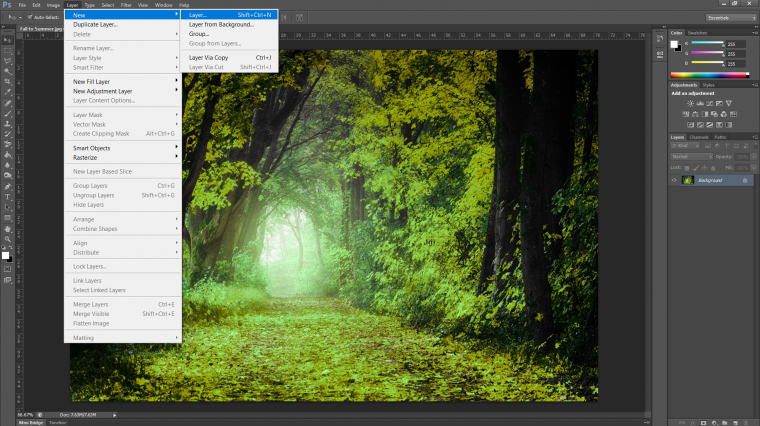
Now you will be able to find your file where you saved it to and open it up in Photoshop, so we can add the lighting effects.
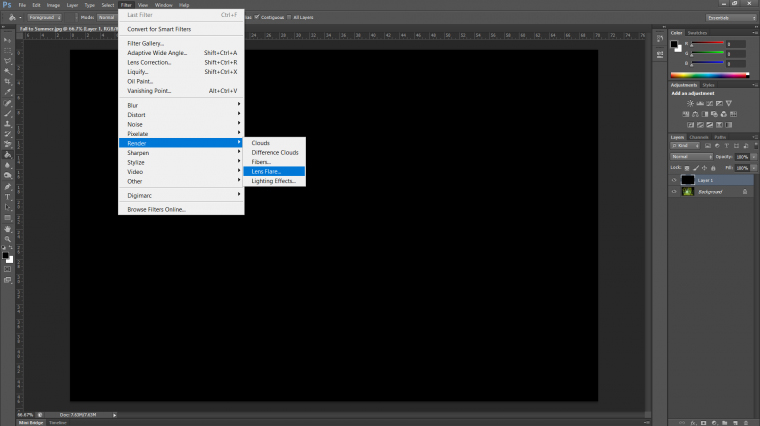
Ok first up in Photoshop is to create a new layer, so go to Layer - New - Layer.
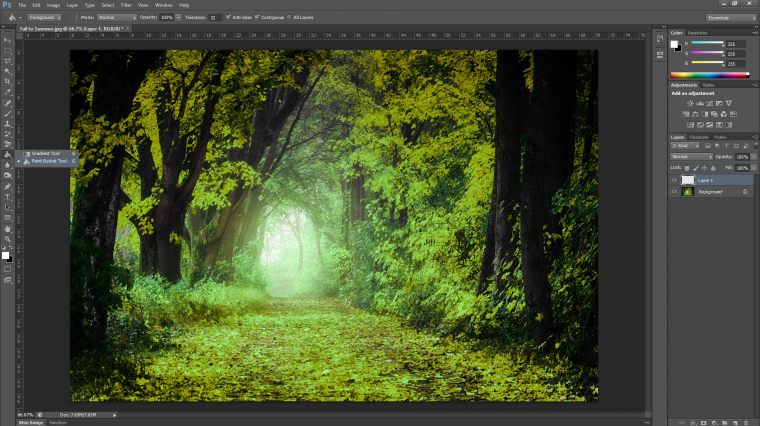
Then use the Paint Bucket Tool to fill it in with Black by choosing Black and then clicking on your image.
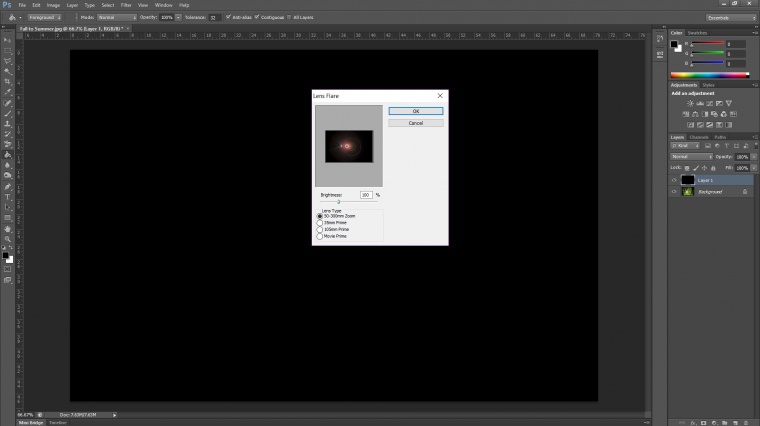
Next go to Filter - Render - Lens Flare.
By clicking on the little cross mark in your Lens Flare Thumbnail you can change the direction of the light to fit the direction the light coming in on your image, I also just chose first option and left it at 100%.
Then into the right in your layers panel you will see beside Opacity the word Normal, click on that to open up the drop down with all the Blend Mode options and choose Screen.
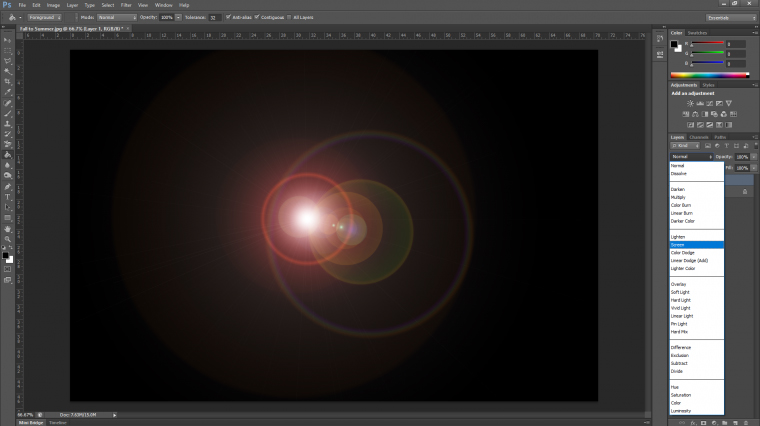
Now keying in on your keyboard Ctrl+T you will be able to adjust the effect layer.
You can also reduce it's opacity, so it doesn't look too bright and that's that!
So hopfully you're happy with your image, you could do a few more things, like I could maybe fix up the path so there's no fallen leaves, but for now we're good.