
 Italiano
 Deutsch
 Español
 Português
 Français


04 / Mar, 2019
Comment 13750 Views How to Import a Photo into Lightroom
Category: Photography
Getting Started: Import a Photo into Lightroom
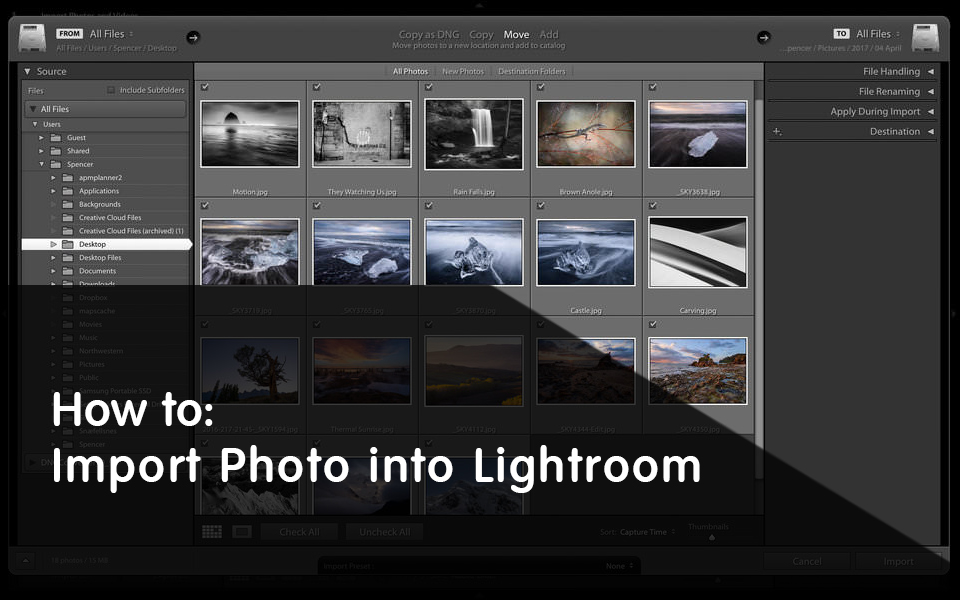
When you open Lightroom, you’ll notice a box at the bottom-left that says “Import…”
Click it, and you’ll enter what is known as the Import Dialogue. (Alternatively, the Import Dialogue might open automatically when you enter Lightroom or put a memory card in your computer, depending upon your Lightroom > Preferences settings at the top of the screen.)
The Import Dialogue is where you choose which photos to add to your Lightroom catalog to organize and edit them. You’ll probably end up opening the Import Dialogue a lot — each time that you’ve returned from a photo shoot and you’re loading images onto your computer.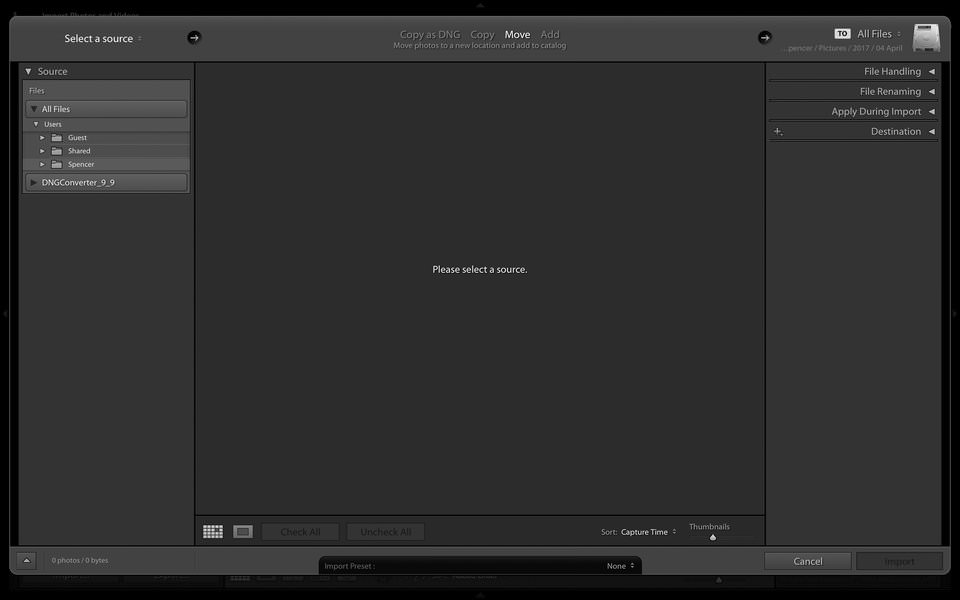
Within the Import Dialogue, there are plenty of options available. I’ll cover the most important below:
The Left-Hand Side
The easiest part of the Import Dialogue is the tab on the left-hand side. This is where you choose which photos you want to open in Lightroom, simply by clicking on the folder (or memory card) where they currently reside.
There’s not too much to say here, except that you may notice something interesting: It’s not just your memory card that shows up here. If you’re trying to import a photo into Lightroom that’s currently on your Desktop, or in your Downloads file, or anywhere else, you can do so without a problem.
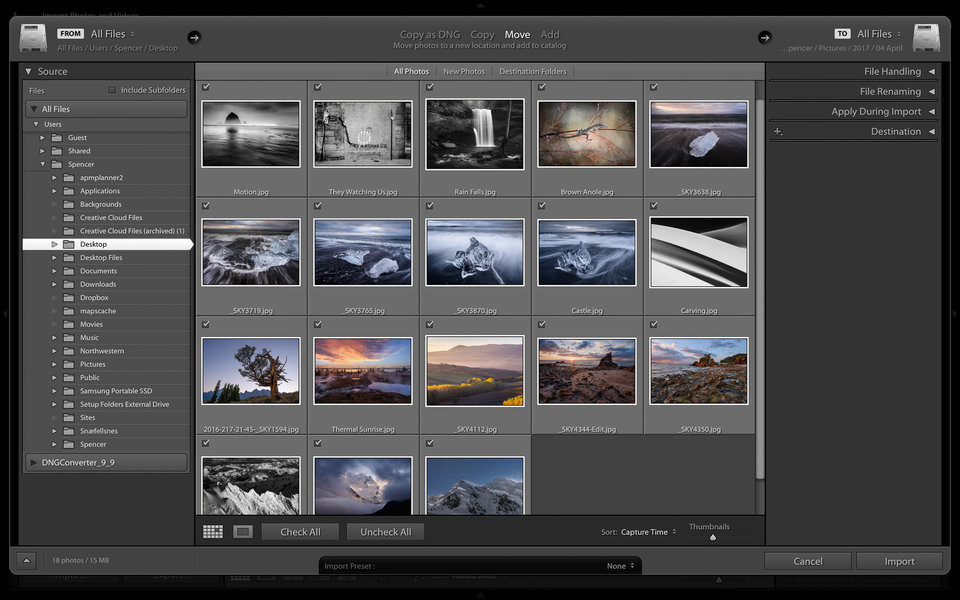
The Top Options
The top of the Import Dialogue gives you a few more options. Specifically, there are four different ways to import your photos into Lightroom’s catalog: “Copy as DNG,” “Copy,” “Move,” and “Add.” Each one is there for a reason, depending upon what you want Lightroom to do with your photos.

Add is great if you don’t want to move the actual file on your computer to a new location; you simply want the photo to show up when you open Lightroom. This is ideal if you have a photo that’s already in the right place on your computer’s hard drive.
Move is best if you’re trying to add one of your photos to your Lightroom catalog, but it’s not in the right place on your computer. So, if one of your photos is on your Desktop, but you want it to appear under Photos > 2017 > April, you can move the photo to the proper location, while simultaneously telling Lightroom to add it to your catalog.
Copy is best if the photo you want to add to your catalog isn’t in the right location yet, but you still don’t want to delete it from its current location yet; instead, you just want to duplicate it somewhere else. This seems odd, but it’s actually quite useful. When I’m loading photos from someone else’s flash drive, I don’t want to move the photos from their flash drive onto my computer (since that would effectively delete them from their original location). Instead, I simply want to create a duplicate of the photos and put it in the right spot on my computer. Ultimately, the duplicated file is the one that Lightroom adds to your catalog.
Copy as DNG is one that you are less likely to use. This option is what happened when the Lightroom developers realized that if you’re copying a photo from one location to another, the new duplicate can actually be a different file type than the original, if there’s a benefit to doing so. “Copy as DNG” does 100% exactly the same as “Copy,” except that the new, duplicate photo in the proper location will be saved as a .DNG file rather than a JPEG, TIFF, CRW, NEF, or whatever it was originally.
Personally, when I’m loading photos from a memory card onto my computer, I prefer to copy the photos rather than move them. That way, I maintain two versions of each photo: one on my memory card, and one at the new spot on my computer. This is nice just in case my computer’s hard drive breaks before the new photos are backed up. (“Add” isn’t really a viable option here, because, when I eventually remove the memory card from my computer, the photos wouldn’t appear in my catalog any longer!)
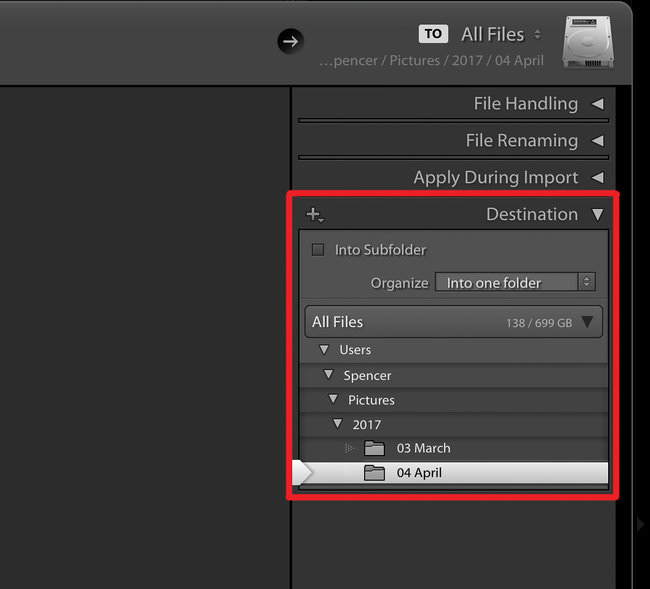
The Right-Hand Side
There are a lot of options along the right-hand side of the import dialogue. It can seem overwhelming if you’ve never used Lightroom before.
However, the main purpose of the right-hand bar is just to tell Lightroom where to put the photos that you’re moving, copying, or copying as DNGs. (It doesn’t appear if you’re adding photos, since Lightroom assumes that they’re already in the right place.)
Beyond that, the rest of the options are up to you. You can choose to rename the files you’re adding, which could be helpful for organization purposes. You can apply a set of “develop settings” to the photos you add — say, applying a pre-chosen amount of sharpening and noise reduction to each photo — or a “metadata” setting, such as filling in the copyright section of each photo you open. You can choose to create a second copy of every photo you import so that you have a backup (though this may be overkill if you already have a constant backup to an external hard drive or the cloud).
You’ll find yourself personalizing this section significantly over time. If you’re interested in more information about some of these options, you may want to read our full article on the Lightroom import dialogue
For now, once you’ve chosen the right destination folder, you’re good. Every single one of these settings is reversible at any point in the future.
The Bar at the Bottom
The last bit of the import dialogue is the bar along the bottom. The main option here is the “Import Preset” section. This is what lets you save all the settings you just chose — the copy/move/add settings, the destination folder, the options on the right-hand sidebar — and use the exact same ones at some point in the future.
Aside from that, once you’ve selected all the photos you want to add to your catalog, you’re done! Click the “Import” button at the bottom-right of your screen, and you’re ready to organize and edit the photos you’ve just added.


