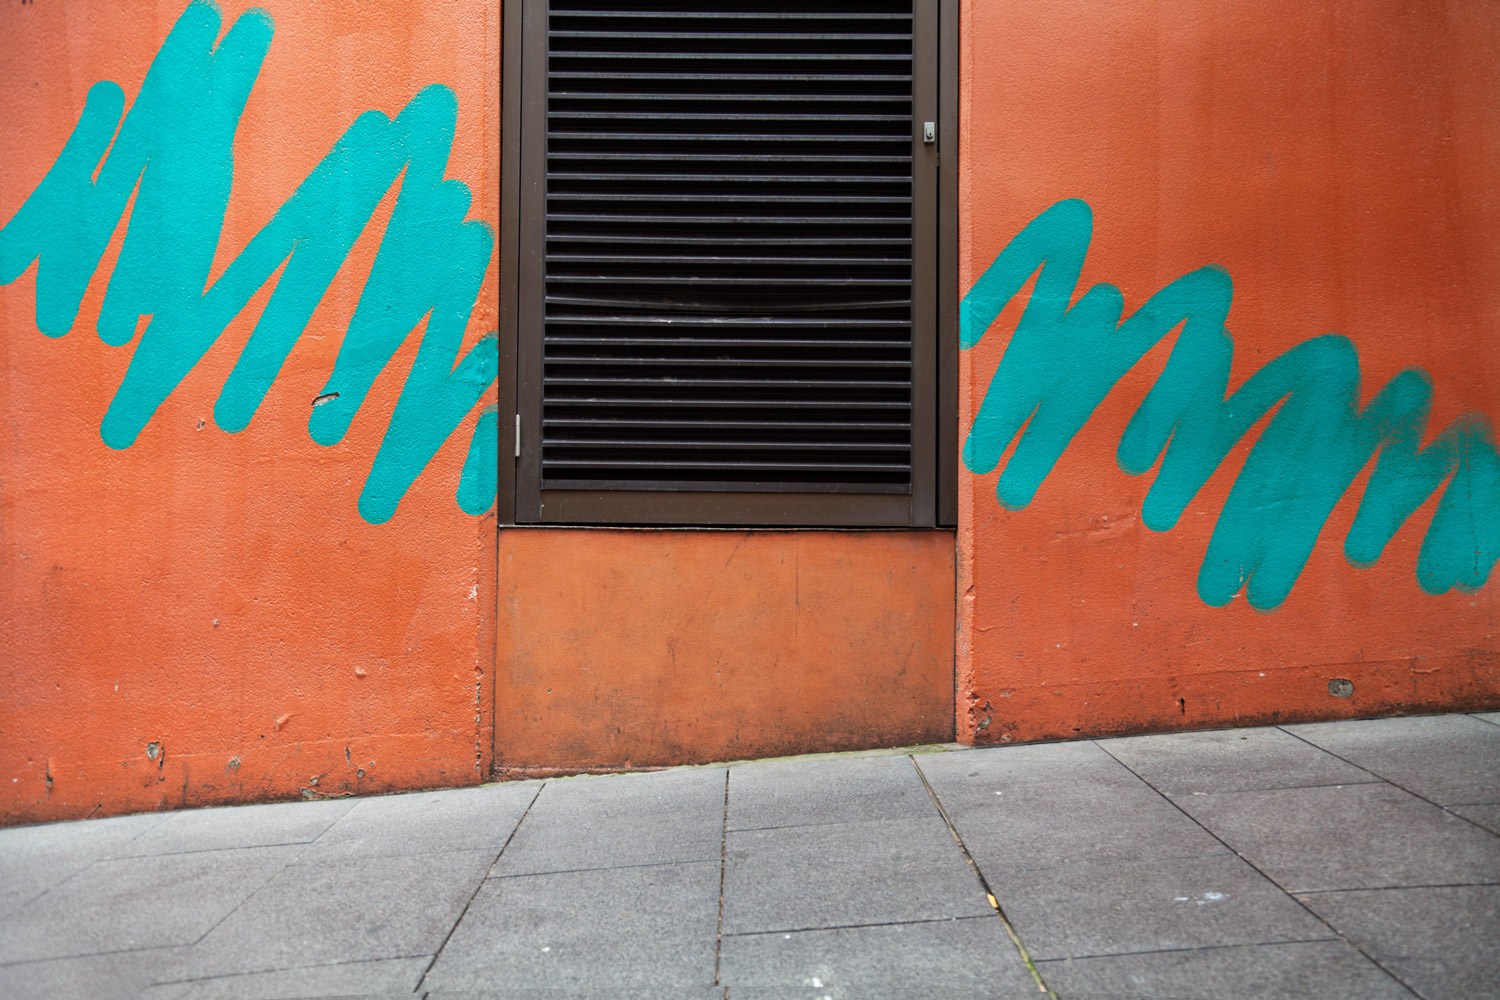

With the help of Photoshop, swapping the colors of different elements in a photograph is quick and easy. Here are two ways to switch the colors in your image to make them more dynamic.
Method one – Using the Replace Color Panel
The Replace Color panel is a simple tool designed to tweak color selections. When you select a specific color in the image, the Replace Color function grabs similar colors, allowing you to change them within the same action.
Step 1 – Preparing your image
First, open your image in Photoshop. To edit non-destructively we need to duplicate the layer. That way, we can go back to the original image at any time. Select your image in the Layers Pallet, then go to Layer -> Duplicate Layer. Alternatively, you can right-click on your image in the layers panel and click Duplicate Layer or drag your layer onto the New Layer icon.
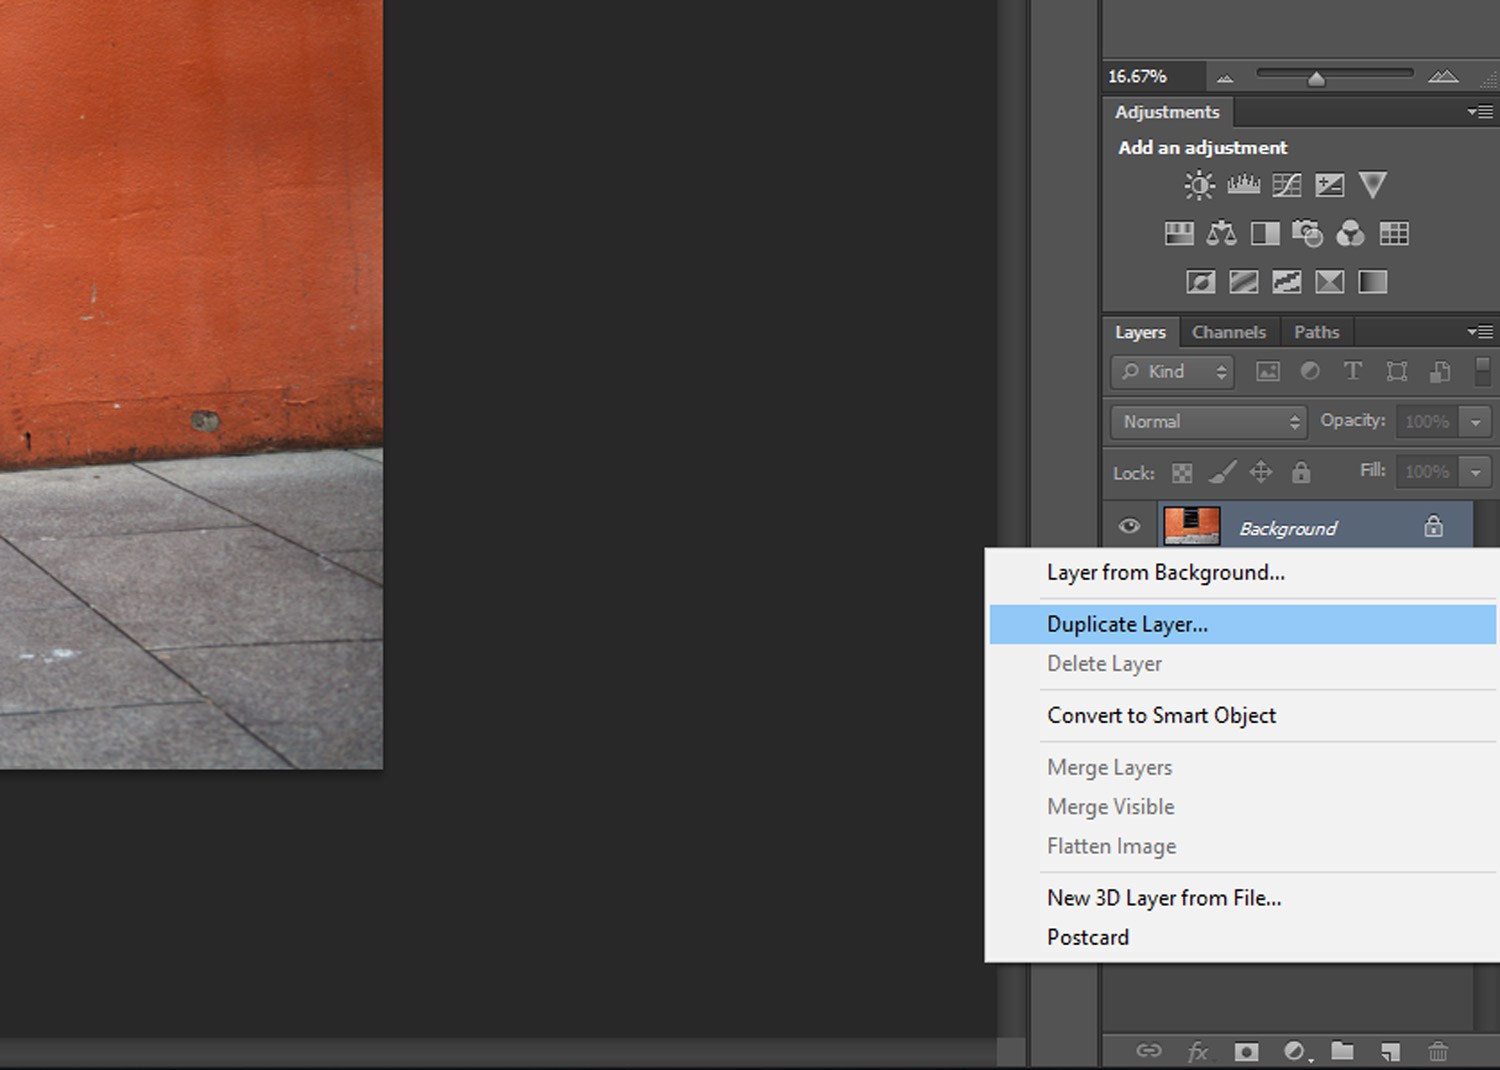
Step 2 – Selecting a Color to Replace
With your duplicate layer selected in the Layers Pallet go to Image -> Adjustments -> Replace Color and the Replace Color panel will pop up. Check the Localized Color Clusters and Preview options. The cursor will automatically be converted to an eyedropper icon, so click on the color in the image that you want to replace. This highlights the color in white in the preview thumbnail, so you can see how much of the color is selected.
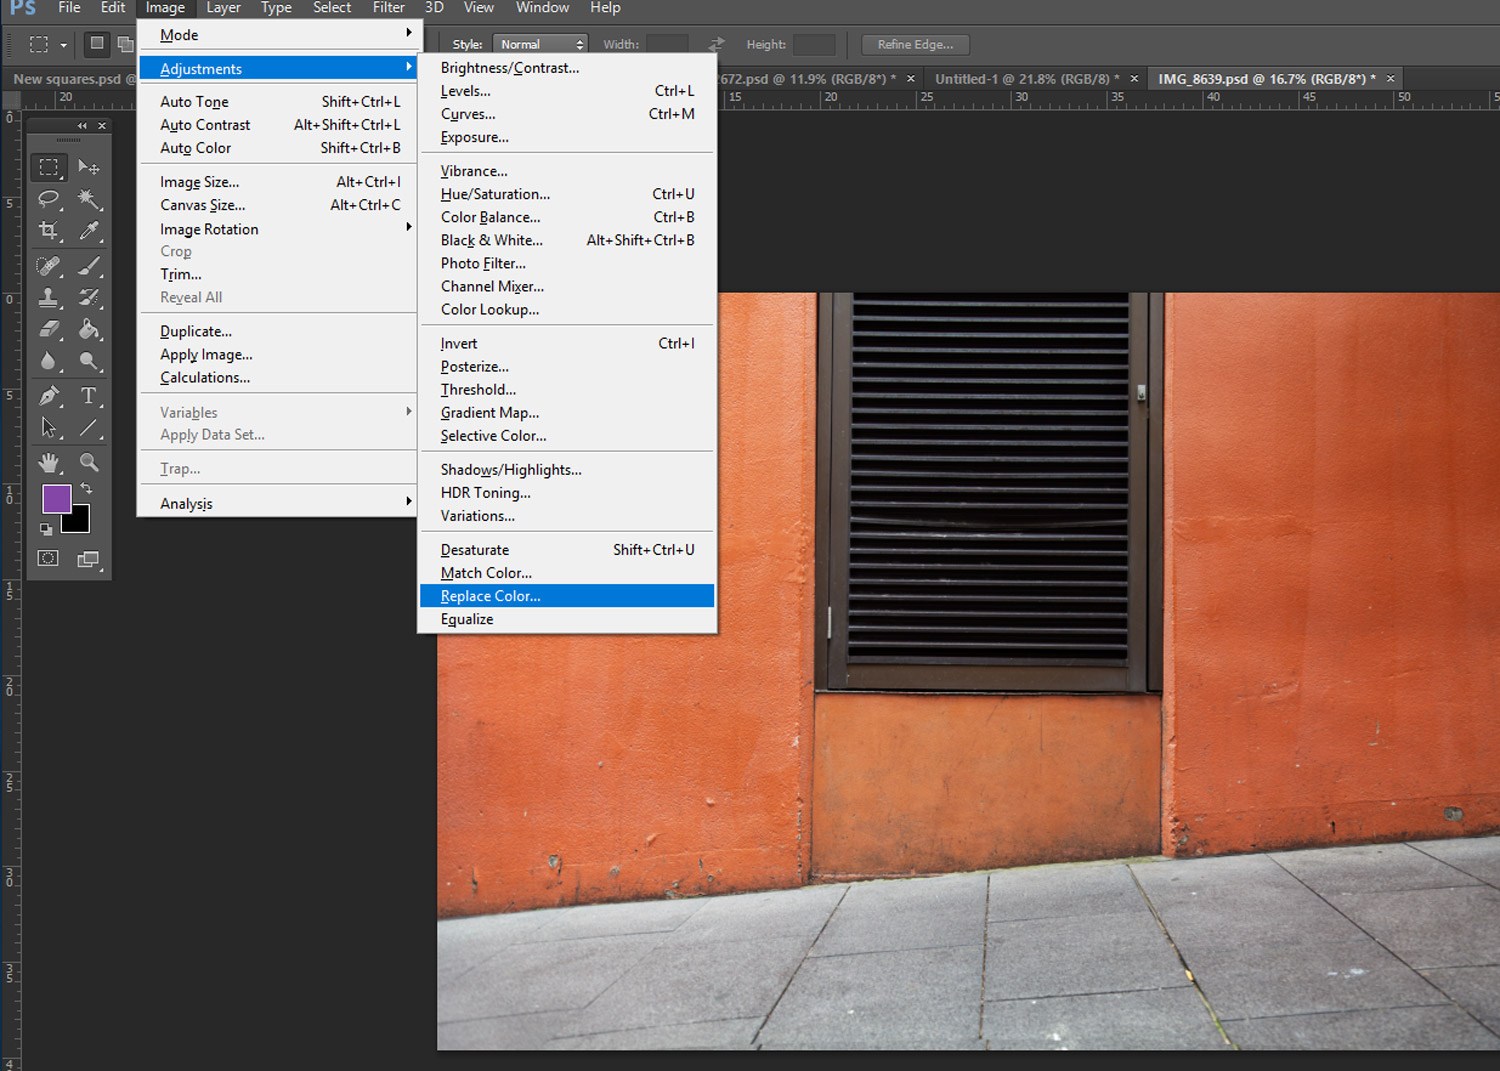
Go to Image -> Adjustments -> Replace Color to open the Replace Color panel
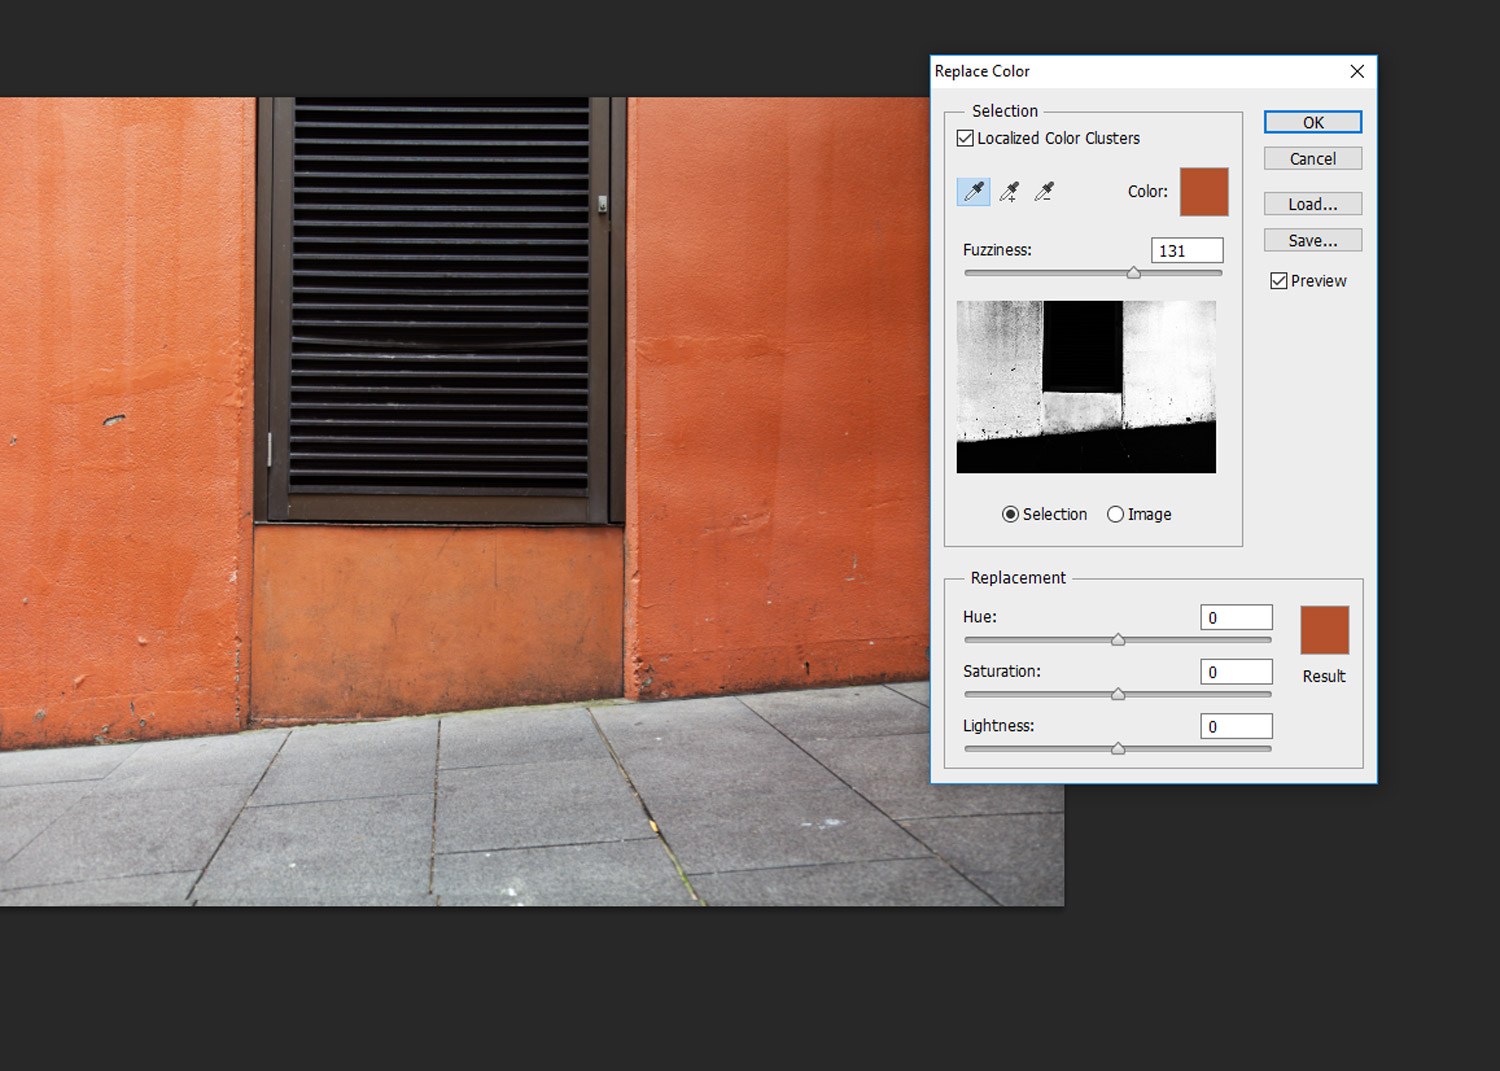
Click on the color in the image that you want to replace. This highlights the selection in white in the preview thumbnail
Step 3 – Adjusting the range
The next step is to add further shades of your chosen color to the selection so it looks more natural. With the Replace Color panel still open, hold down the shift key and click on more shades of your selected color in the image. This adds new shades of your selected color to the preview thumbnail.
If you accidentally select an area, hold down the alt key and click the area again to deselect the selection. You can adjust the edges of the selection with the Fuzzinessslider, this dictates the sharpness of the edges in the selection.
Step 4 – Swapping the color
In the Replace Color panel, use the Replacement Hue slider to adjust the color of your selection. Once you’re happy with the color, use the Saturation slider to increase or decrease the intensity of the replacement color. You can also adjust the Lightness slider which tweaks the shade of the replacement color.
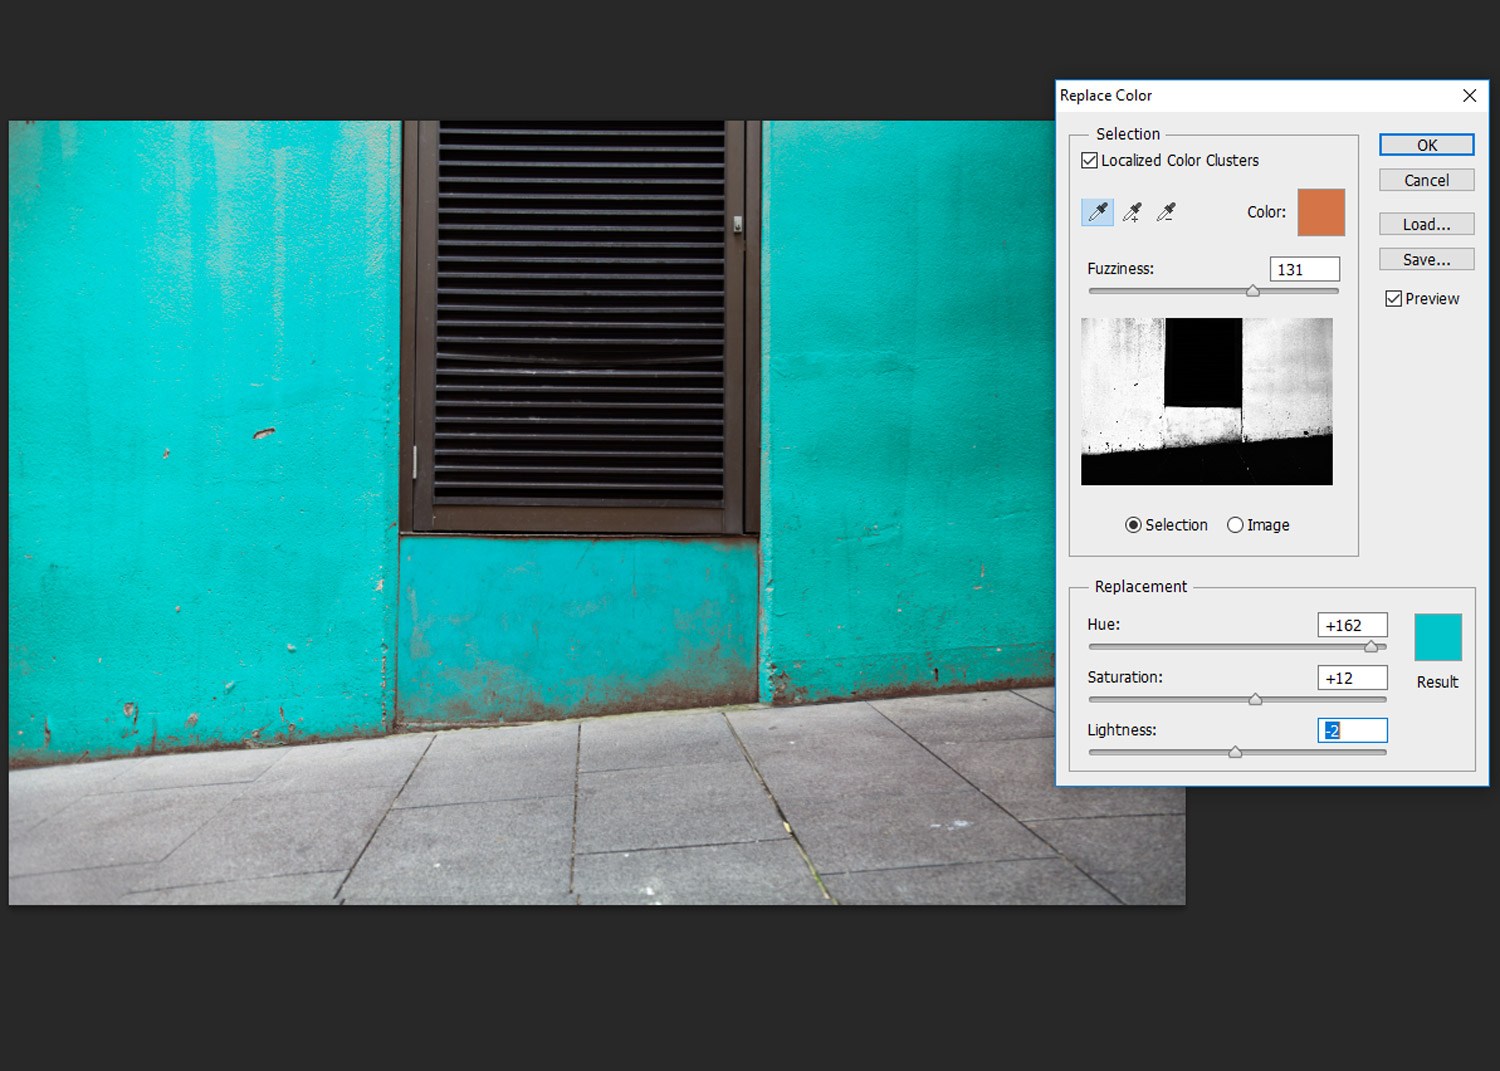
Use the Replacement Hue slider to adjust the color of your selection
To make sure the edges of the selection have adequate coverage, you may need to readjust the Fuzziness slider.
Once you’re happy with your results, click OK. Your adjustments will be applied to your image and you’re good to go!
Method two – Using the Color Replacement Tool
The Color Replacement Tool is an alternative to using the Replace Color panel. With the Color Replacement Tool, you can apply a replacement color to a more targeted area in the image.
Step 1- Preparing Your Image
Just like in the first method, we need to duplicate the original layer so we can return to the original image if required. Select your image in the Layers Palette then go to Layer -> Duplicate Layer or right click on the layer in the Layers Pallet and click Duplicate Layer.
Step 2 – Selecting the Color Replacement Tool
Accessing the Color Replacement Tool is a little tricky. Click and hold the cursor over the Brush Tool on the left toolbar and several brush options will appear. Select the Color Replacement Tool.
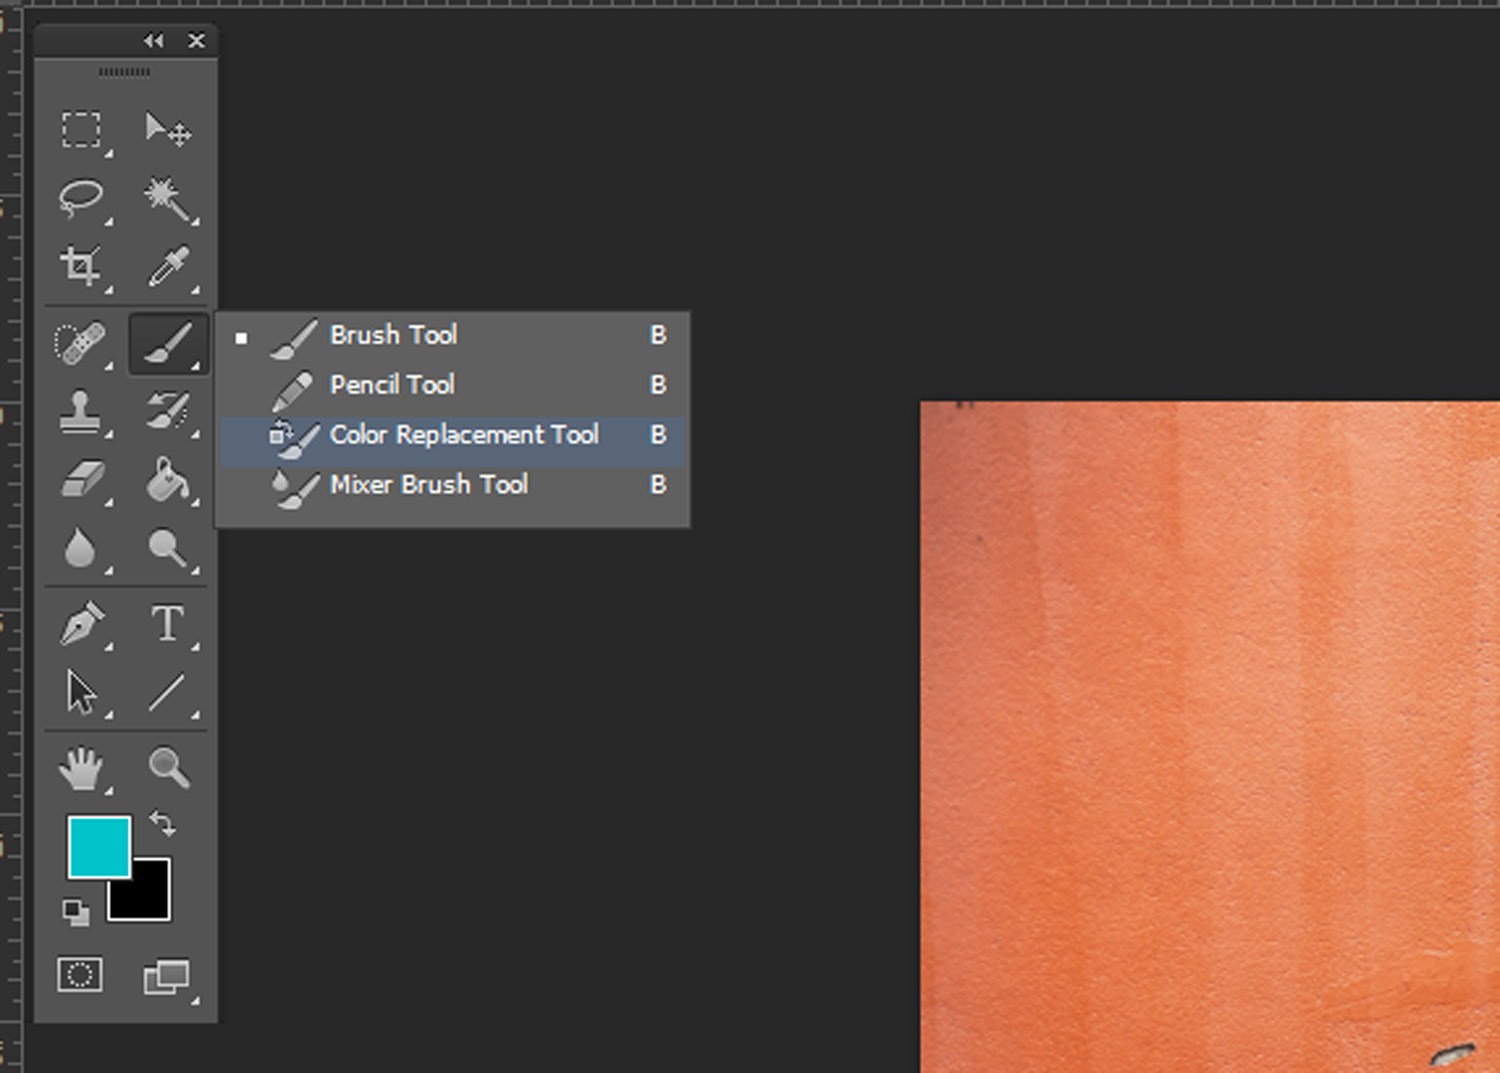
Step 3 – Setting your foreground color
With the Color Replacement Tool selected, set your foreground color to the color you want to replace your current color with. So if you want to change a red subject to blue, select blue as your foreground color.
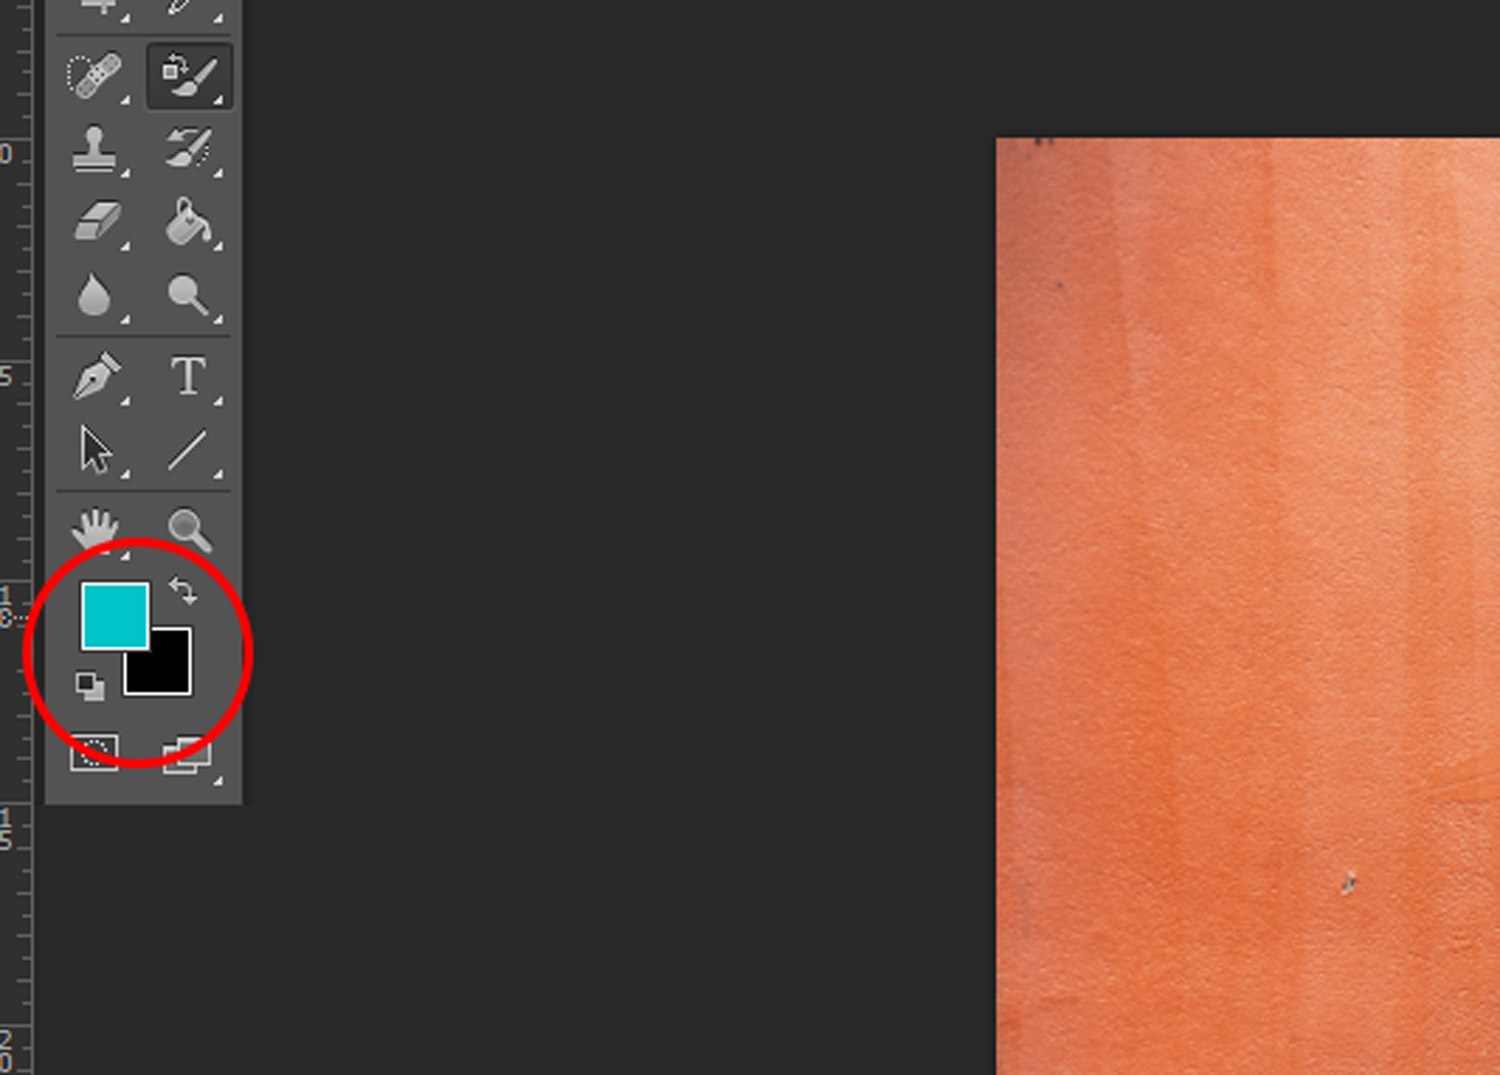
Step 4 – Applying color with the Color Replacement Tool
With the Color Replacement Tool selected, brush over the area of color you want to replace. You can adjust the settings of the brush (size, shape, tolerance) in the top menu bar.

Conclusion
Color is a wonderful and versatile element of composition. But sometimes the right color scheme is elusive. That’s where the Color Replacement tools come in handy.

 Italiano
 Deutsch
 Español
 Português
 Français


